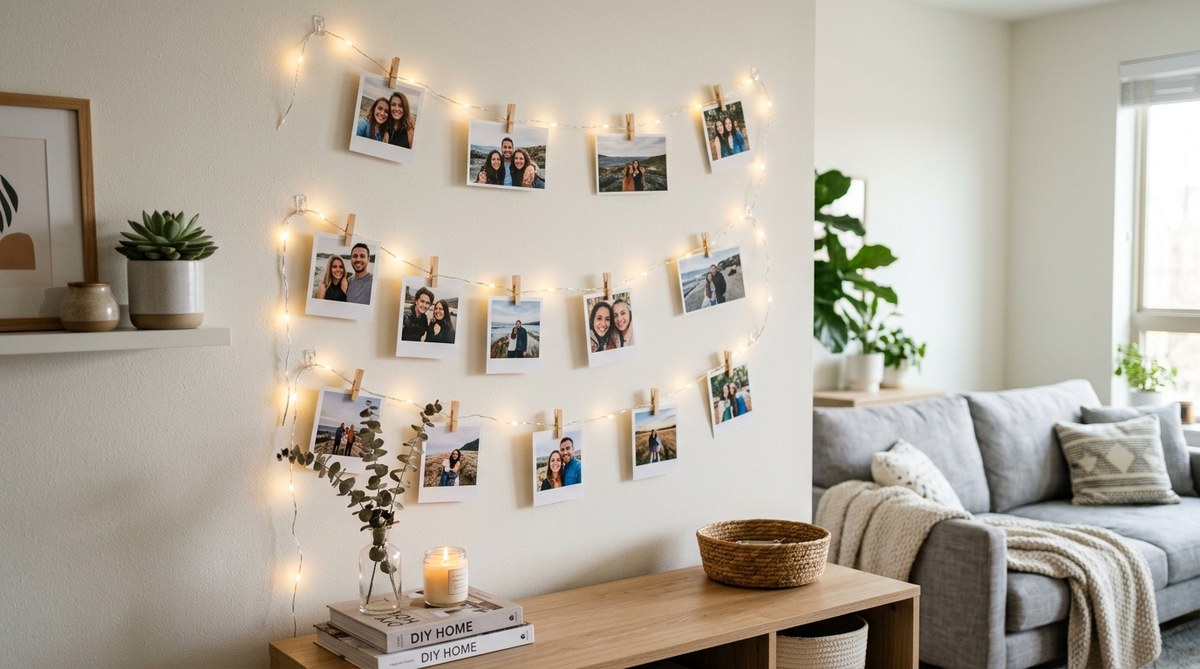
You look at that blank wall in your apartment and feel the need for something personal. Something that reflects your favorite memories without costing a fortune or requiring a drill. A DIY photo wall with string lights is the answer. It turns a boring corner into a gallery of moments. And it takes only an afternoon to set up.
A DIY photo display wall with string lights is one of the most affordable ways to personalize your space. You need just a few items: string lights, mini clothespins, printed photos, and removable adhesive hooks. In about two hours you can transform any wall into a glowing memory board that is easy to update and leaves no damage when you move out.
Why Pick String Lights for a Photo Wall?
String lights are not just for holidays. They add a warm, soft glow that makes photos feel cozy and inviting. Unlike heavy frames or command strips that can peel paint, string lights hang lightly and can be rearranged without hassle. Renters love this method because it leaves no holes or sticky residue when done right. Students can fill a dorm wall with pictures of friends. Crafty folks can swap out photos seasonally. The result is always unique to you.
A photo wall with string lights also does double duty. In the day, the photos are the star. At night, the glowing bulbs create a gentle nightlight effect. If you are working on a larger home decor project, consider how this technique fits into transform your space with simple DIY wall art ideas. It is a low risk way to test your design skills before tackling bigger pieces.
What You Will Need to Gather
Before you start printing photos, collect these supplies. Most are easy to find online or at a local dollar store.
- String lights: 15 to 30 feet depending on your wall width. Look for warm white LED bulbs. They stay cool to the touch and use little energy.
- Mini clothespins or clips: The tiny wooden clothespins work best. Plastic ones are fine too. You need about one per photo.
- Printed photos: 4×6 inch prints are ideal. Glossy or matte, both work. Avoid very thick paper that might droop.
- Removable adhesive hooks or clear Command hooks: These hold the string lights in place and come off cleanly.
- Scissors and measuring tape: For cutting string light lengths and spacing hooks.
- Level (optional): Helps keep rows straight. Not essential if you like a casual look.
- Batteries (if using battery operated lights): Check the strip. Some string lights plug into a USB port.
If you want to add variety, consider including a few polaroid style prints, postcards, or small artwork. The mix keeps the wall interesting.
How to Create Your DIY Photo Display Wall in 5 Steps
Follow these numbered steps to build your wall correctly the first time.
-
Choose the layout. Decide if you want a straight line, zigzag, or freeform shape. L shape along a corner works well for narrow walls. For a wide wall, three horizontal rows of lights create a balanced look. Draw a rough sketch on paper.
-
Mark hook positions. Hold the string light strand against the wall to see where the bulbs naturally fall. Place an adhesive hook every 18 to 24 inches along the planned path. If your lights have a long lead wire from the plug, tuck that behind furniture or use a hook to hide it.
-
Hang the string lights. Stick the hooks onto the wall. Press firmly for 30 seconds each. Drape the lights over the hooks. Do not pull the wire too tight. A slight sag looks natural and gives you room to attach photos. Plug in the lights to confirm they work before adding photos.
-
Attach your photos. Use mini clothespins to clip photos directly onto the string light wire. Clip near the bulb or between bulbs. Space photos 4 to 6 inches apart for a clean look. Mix orientations: some vertical, some horizontal. Avoid placing a photo directly over a bulb if you want the light to glow from behind. For a brighter effect, clip photos slightly off center so the bulb shines beside the image.
-
Step back and adjust. Turn on the lights and view the wall from across the room. Shift photos that feel too crowded. Add or remove clips until the arrangement feels balanced. You can always swap photos later without changing the lights.
For a more permanent look, you can also use small binder clips that grip the wire tightly. But clothespins are easier to remove and swap.
Design Ideas to Make Your Wall Shine
Your photo wall can be more than just a random grid. Try these creative approaches.
Theme Based Display
Pick a theme like “summer road trip” or “senior year.” Print only photos that match the mood. Add a few small souvenirs like a ticket stub or a pressed leaf clipped to the same wire. This turns the wall into a storytelling piece.
Minimalist Monochrome
Use black and white photos only. Choose warm white string lights. This style fits neatly in a modern living room or home office. It feels curated without being busy.
Seasonal Rotation
Change photos with the seasons. Fall colors, winter holidays, spring blooms. Keep a small box of themed prints handy. Rotating the display every three months keeps the decor fresh. You can even add 5 trendy DIY projects to try in 2026 for inspiration on other areas of your home.
Collage of Sizes
Mix 4×6 prints with larger 5×7 or 8×10 photos. Use two clothespins for heavy prints to prevent sagging. Place the larger photos at eye level and smaller ones above or below.
Common Mistakes and How to Avoid Them
Even a simple project has pitfalls. Here is a table of frequent issues and real solutions.
| Mistake | Why It Happens | How to Fix It |
|---|---|---|
| Photos droop or spin | Single clothespin on one edge | Use two clothespins on opposite corners for heavier prints. For lightweight photos, clip at the top center only. |
| String lights sag too much | Hooks placed too far apart | Add extra hooks between existing ones. Maximum spacing should be 24 inches. |
| Bulbs get covered by photos | Clipping directly over the bulb | Clip photos to the wire beside the bulb. Or use bulb clip covers that let light pass through. |
| Adhesive hooks fall off | Wall is dusty or painted with low quality paint | Clean the wall with rubbing alcohol before sticking. Wait 1 hour before hanging anything. |
| Photos look dull at night | Warm white bulbs too dim or too bright | Use lights with adjustable brightness if available. Otherwise, space photos further apart to let more light through. |
| Cord is visible and ugly | Lead wire from the plug is too long | Tuck the cord behind furniture or use a cord cover that matches your wall color. |
Expert tip from a long time renter: “I bought a set of string lights with a remote control dimmer. It cost only three dollars extra but I can change the brightness depending on the time of day. Good photos deserve good lighting control.”
Choosing the Right String Lights
Not all string lights are equal for a photo wall. Look for these features when buying.
- Bulb shape: Mini globe bulbs give a soft glow. Fairy lights (tiny pinpricks of light) are harder to clip photos onto because the wire is thin. Go with bulbs that have a visible wire strong enough to hold a clothespin.
- Color temperature: Warm white (2700K to 3000K) flatters skin tones in photos. Cool white looks harsh and feels like an office.
- Power source: Battery operated lights give you freedom to place the wall anywhere. Plug in lights are brighter and never need new batteries. USB powered lights are a middle ground.
- Length: Measure your wall width and multiply by the number of rows you want. Add two feet extra for slack. A 20 foot set covers a typical 5-foot wide wall with two rows of lights.
For a complete list of gear, check out top 10 essential tools for successful DIY home projects. It covers items like level, tape measure, and adhesive removers that make installation smoother.
How to Make Your Photo Wall Last
Once you have the wall set, a little care keeps it looking great.
- Dust the bulbs and photos gently with a microfiber cloth every few weeks. Dust makes the light look dim.
- Replace batteries (if using) once a month or connect to a smart plug for automatic on/off.
- Rotate photos every season to prevent fading. Direct sunlight can bleach prints over time. Place the wall away from south facing windows if possible.
- Check adhesive hooks every few months. Warm climates can soften adhesive. Replace any hook that feels loose.
Personalizing Beyond Photos
The string light photo wall is a base. You can expand it without making it cluttered.
- Add small mirrors or decorative frames clipped to the same line.
- Hang a lightweight garland (fake leaves or paper flags) between photos for texture.
- Use colored clothespins that match your room’s accent color.
- Include a small whiteboard or chalkboard clip for notes.
If you enjoy this style, you might also like easy DIY storage solutions for small spaces because a photo wall can double as a message center for keys or reminders.
When Things Do Not Go as Planned
Maybe your wall texture is too rough for adhesive hooks. Or the string light wire is too thin for clothespins. Do not give up. Try these workarounds.
- Rough walls: Use small nails or push pins instead of hooks. They leave tiny holes but spackle is cheap.
- Thin wire lights: Thread the wire through a small binder clip instead of using clothespins. The clip grips the wire securely.
- Battery pack placement: If your lights have a heavy battery pack, hide it inside a decorative box on a shelf below the wall. Run the wire up from the box.
- Crooked photos: Use a level as a guide when you first hang the main strand. The photos will then align naturally.
Renting does not mean you cannot have personality on the walls. Many landlords allow small nail holes. Even if they do not, master basic home repairs to save money and increase safety can help you patch holes before moving out.
Your Wall, Your Story
The best part of a DIY photo display wall with string lights is how personal it feels. You are not buying generic art from a store. You are curating your own memories and lighting them in a way that makes you smile every time you walk past. It is also cheap enough to remake entirely when your tastes change. So print those photos from your phone. Grab a set of lights. Spend an hour clipping and arranging. By tonight, that empty wall will be telling your story. And if a friend asks where you bought it, you can proudly say you made it yourself.
Start today. Your wall is waiting.