You have an old dresser that no longer fits your bedroom style. Maybe it is scratched, outdated, or simply taking up space. Before you toss it or sell it for pocket change, consider this: that dresser can become the centerpiece of your dining or living room. With a few modifications and a little creativity, you can transform a clunky chest of drawers into a functional buffet table that adds storage and serving space to your home. This project is budget friendly, requires only basic tools, and can be finished in a weekend. It is one of the most satisfying ways to upcycle furniture, and it saves you hundreds of dollars compared to buying a new buffet.
Converting a dresser to a buffet table is a straightforward weekend project that combines storage with serving space. You will need a sturdy dresser, sandpaper, paint or stain, new hardware, and optional touches like a countertop or wine rack. The result is a custom piece that fits your decor and saves money. This guide covers every step from choosing the right dresser to styling the finished buffet for your next gathering.
Why Repurpose a Dresser into a Buffet Table?
Buffet tables are expensive. A solid wood buffet from a furniture store can cost anywhere from $400 to over $1,000. A used dresser from a thrift store or your own basement costs a fraction of that. Plus, you are giving new life to a piece that might otherwise end up in a landfill. The transformation also lets you control the final look. You can choose a paint color that matches your existing trim, swap out dated knobs for modern pulls, and even add a butcher block top for extra serving area. If you love DIY projects that make a statement, this one belongs on your list.
A buffet table serves multiple purposes. Use it during holiday dinners to hold serving dishes. Store your collection of table linens, extra dinnerware, or board games in the drawers. During parties, it becomes a beverage station. And when you are not entertaining, it functions as a stylish console table in your living room or entryway.
Tools and Materials You Will Need
Before you start, gather these supplies. Most items you probably already own.
- Dresser (solid wood or plywood construction; avoid particle board that will not hold up)
- Sandpaper (80 grit, 120 grit, and 220 grit)
- Primer (water based for most surfaces)
- Paint or stain (choose a finish that coordinates with your room)
- Paintbrushes and foam rollers
- Screwdriver or drill
- New drawer pulls or knobs
- Wood filler (for filling old hardware holes)
- Tape measure
- Drop cloth
- Optional: a piece of butcher block, marble tile, or plywood for a new top
- Optional: wine rack inserts or shelf brackets for interior customization
Step by Step Transformation Process
Follow these eight steps to turn your dresser into a stunning buffet table.
1. Choose the Right Dresser
Not every dresser is a good candidate. Look for one that is roughly 30 to 36 inches tall. Buffet tables typically stand between 30 and 36 inches high. The width should be at least 40 inches so it can hold serving dishes. Check that the dresser has at least three drawers. More drawers give you more storage. Avoid dressers with major water damage or wobbly legs. A solid wood frame will handle the weight of heavy platters.
2. Remove Drawers and Hardware
Pull out all the drawers and remove the knobs or pulls. Set the hardware aside in a bag. If you plan to reuse the hardware, clean it with a mild soap. For a fresh look, buy new pulls that contrast with your paint color. Remove any metal tracks or glides if you want a more seamless look.
3. Sand and Prep the Surface
Lightly sand the entire dresser body and drawer fronts with 120 grit sandpaper. This helps the primer stick. Wipe away dust with a tack cloth. Fill any screw holes or scratches with wood filler. Let the filler dry, then sand smooth. If your dresser has a glossy finish, use a deglosser or sand with 80 grit to break the shine.
4. Prime and Paint
Apply a coat of primer to all exposed surfaces, including the drawer fronts and the top. Primer prevents the old finish from bleeding through and gives the paint a uniform base. Once the primer is dry (follow manufacturer instructions), apply two coats of paint. Use a foam roller for smooth surfaces and a brush for corners. Latex or chalk paint works well. Chalk paint requires less prep but needs a wax or topcoat for durability.
5. Add New Hardware
After the paint has cured for at least 24 hours, install your new pulls or knobs. Measure carefully to ensure they are aligned. If the new hardware has a different screw spacing, fill the old holes with wood filler and drill new holes. This is a small step that makes a big visual impact.
6. Upgrade the Top Surface
A buffet table needs a top that can handle heat and spills. If your dresser already has a solid wood top, you can simply sand and seal it. Otherwise, add a new top. A standard option is a piece of butcher block cut to size and secured with wood glue or screws from underneath. You could also use a remnant of quartz or marble tile for a high end look. If you go with tile, use a wet saw to cut it and attach with construction adhesive.
7. Customize the Interior
The drawers are one of the best features of a dresser to buffet conversion. But you can also remove some drawers to create open shelving for wine bottles or decorative baskets. To do this, remove the drawer and install a wood shelf at the same height. Or install a wine rack kit. Another idea: line the inside of the drawers with felt or contact paper so they protect your good china.
8. Style and Use
Once your buffet table is assembled, place it in your dining or living room. Style the top with a tray, a vase of flowers, and a few serving pieces. Use the drawers to store tablecloths, napkins, and candles. For party season, set up a coffee and tea station on top, with mugs and stirrers in the drawers.
Common Mistakes to Avoid
| Mistake | Why It Hurts | How to Avoid |
|---|---|---|
| Skipping primer | Paint may peel or original color bleeds through | Always prime, especially if the dresser has a dark finish. |
| Not sanding well enough | Paint will not adhere properly | Sand with 120 grit until the surface feels dull, not smooth. |
| Choosing the wrong height | Buffet too low or high for comfortable serving | Measure your existing dining table height; buffet should match within 2 inches. |
| Using cheap paint | Chips easily under heat or moisture | Use a semi gloss or satin finish latex paint, or chalk paint with a wax seal. |
| Forgetting to reinforce the top | Top may sag under heavy platters | If you add a butcher block top, screw it into the frame from underneath. |
Expert Advice for a Flawless Finish
"The biggest mistake I see in dresser to buffet conversions is not properly preparing the drawer fronts. Spend extra time sanding the edges and corners. That is where paint tends to chip first. Also, consider removing the top two drawers and adding cabinet doors for a more furniture like look. It is a little extra work but gives you a wine storage area that looks built in."
* Marissa Kline, furniture refinisher and DIY blogger
Styling Your New Buffet Table
Now the fun part. Your buffet table deserves a pretty setting. Place a large mirror or artwork above it to anchor the wall. Use the top surface to display a coffee service or a stack of salad plates. Add a pair of lamps for ambient lighting during dinner parties. In the drawers, use dividers to keep silverware organized. If you have open shelves, store cookbooks or a small collection of vintage pitchers.
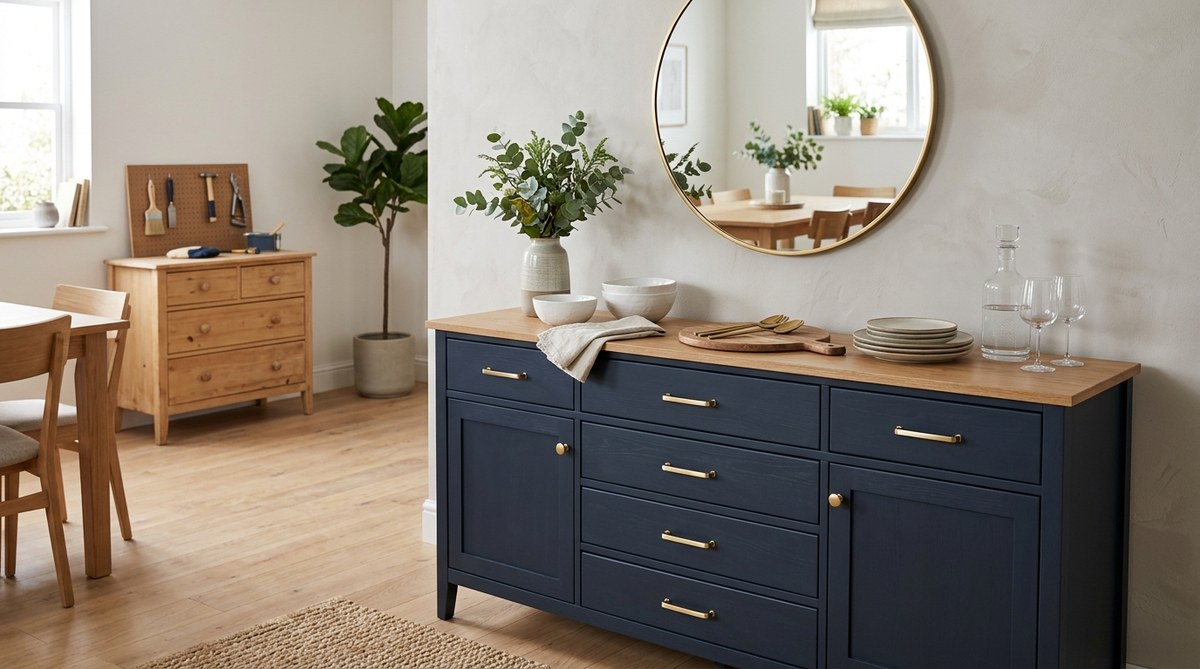
To make the buffet feel cohesive with the rest of the room, match the paint color to an accent in your existing decor. A soft navy blue looks sophisticated against white walls. A farmhouse white works in rustic kitchens. For a modern apartment, try a charcoal gray with brass hardware.
Other Weekend DIY Projects to Boost Your Home
If you enjoyed this dresser to buffet transformation, you might also like to try your hand at other simple upgrades. Consider learning how to build a custom bookshelf without professional help for your living room. Or create a unique accent wall with reclaimed wood to complement your new buffet. For more storage ideas, check out these easy DIY storage solutions for small spaces. And if you still have energy after your buffet project, you could build a modern plant stand with simple tools for the corner of the room.
Make Your Next Gathering Special
Your repurposed buffet table is more than a piece of furniture. It is a conversation starter. When guests ask where you bought it, you will have a story to tell. You saved money, you kept a solid piece of furniture out of the dump, and you created something that matches your home perfectly. So go ahead. Find that old dresser in your garage or at a thrift store. Set aside a weekend. Follow these steps. And enjoy the satisfaction of a beautifully transformed buffet table that you built yourself.