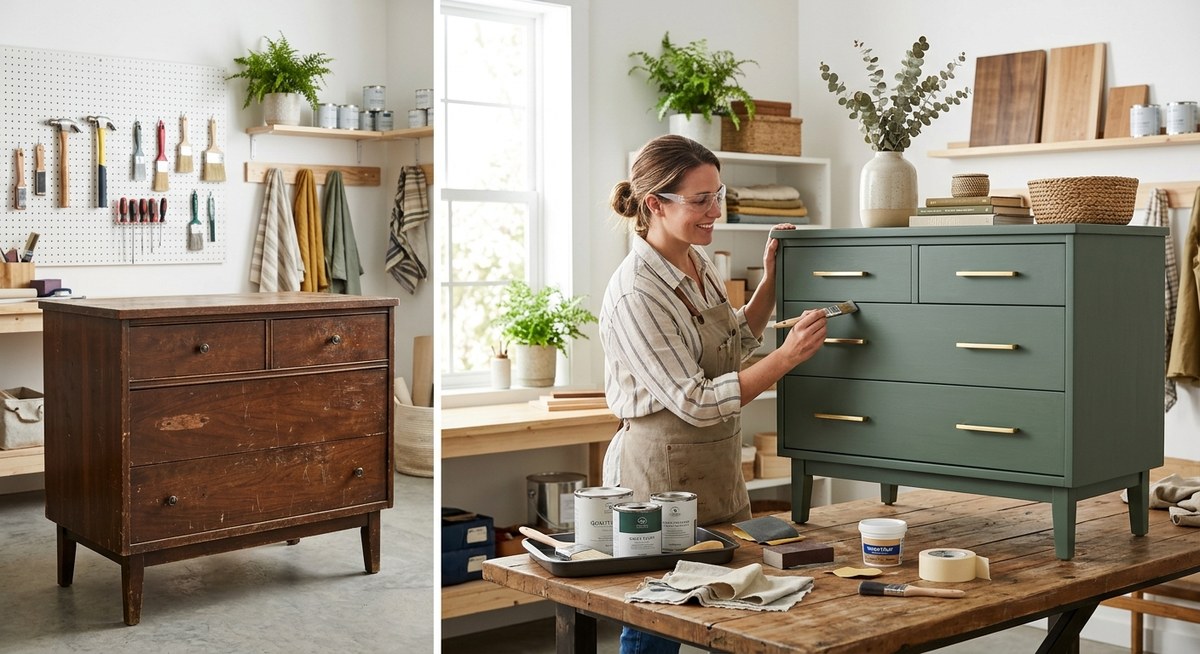
You have an old dresser collecting dust in the garage. Maybe it is a hand me down from a relative, or a curb find you grabbed on a whim. That piece holds potential. With a little time and some basic materials, you can turn it into something that sparks conversation in your living room. Upcycling furniture is about seeing the hidden beauty in worn wood, faded paint, and outdated hardware. It is budget friendly, it is sustainable, and it lets you make something that is truly your own. Whether you want a bold focal point for your entryway or a cozy reading nook side table, these ideas will help you get started.
Upcycled furniture ideas let you refresh your home on a budget while keeping usable pieces out of landfills. Start by finding solid furniture with good bones at thrift stores or yard sales. Focus on clean lines and sturdy construction. Techniques like chalk paint, stenciling, and new hardware can transform almost any piece. Always prep the surface well before painting. With the right approach, even a dated dresser can become a striking accent piece that friends will ask about.
Why Upcycling Furniture Makes Sense Right Now
Home decor costs have climbed steadily, and many people are looking for ways to refresh their space without spending a fortune. Upcycling answers that need. You can pick up a solid wood nightstand for under twenty dollars at a local thrift store. A can of paint, new knobs, and an afternoon of work turn it into something that looks like it came from a boutique shop.
There is an environmental angle too. The United States throws away millions of tons of furniture each year. Most of it ends up in landfills. By giving an old piece a second life, you reduce waste and cut down on the demand for new materials. That feels good.
Beyond the savings and the sustainability, there is the creative thrill. You get to make design choices. You pick the color, the finish, the hardware. No two upcycled pieces look exactly the same. That uniqueness is hard to find in big box stores.
Where to Find Furniture Worth Upcycling
Before you start, you need raw material. Keep your eyes open in these places:
- Thrift stores and charity shops. Goodwill and Salvation Army stores often have hidden gems. Look for solid wood construction and simple shapes that are easy to update.
- Yard sales and estate sales. Saturday morning sales can yield amazing finds. Arrive early and bring cash. Negotiate politely on pieces with minor flaws.
- Facebook Marketplace and Craigslist. Search for keywords like “vintage dresser” or “old table.” Filter by price and look for listings with photos that show the piece clearly.
- Curb alerts. Drive around your neighborhood on bulk trash pickup days. You will be surprised what people throw away. A wobbly leg or a scratched top is often an easy fix.
- Relatives and friends. Let people know you are upcycling. They may have a piece in their basement they are happy to give away.
“The best pieces to upcycle are the ones that feel solid when you shake them. If the frame is sturdy and the drawers slide well, you have a winner. Surface scratches and old paint are just character waiting to be uncovered.” Veteran furniture flipper and DIY blogger, Marissa Cole
A Step by Step Process for Turning Old Furniture Into Gold
Follow this numbered list to take a piece from drab to fab. Each step builds on the last one.
-
Inspect and clean. Wipe down the entire piece with a mild soap and water solution. Remove dust, grime, and any loose debris. Check for structural issues like loose joints or broken legs. Tighten screws and apply wood glue where needed.
-
Strip or sand the old finish. If the piece has a glossy varnish or thick paint, you may need to strip it. Use a chemical stripper for tough jobs. For lighter prep, sand with medium grit sandpaper (around 120 grit) followed by fine grit (220 grit). Always sand in the direction of the wood grain.
-
Prime the surface. A good primer helps paint stick and prevents old stains from bleeding through. Use a high quality water based primer. Apply one even coat and let it dry completely. Lightly sand again with fine grit paper for a smooth base.
-
Paint or stain. Choose your finish. Chalk paint is popular because it adheres well with minimal prep. Latex paint works too if you primed properly. Apply two thin coats rather than one thick coat. Let each coat dry fully between applications.
-
Add details and seal. Once the paint is dry, you can add stencils, decoupage, or wallpaper accents. After any decorative work is done, apply a clear topcoat. Polyurethane or wax will protect the finish from daily wear and tear.
-
Update the hardware. New drawer pulls or knobs can change the whole look. Brass, matte black, or ceramic handles are easy to swap in. Measure the spacing of old hardware before you shop for replacements.
-
Style and place. Bring your finished piece into the room. Style it with accessories that match its new personality. A plant, a stack of books, or a small lamp can help it feel at home.
Upcycled Furniture Ideas for Every Room
The same basic steps can produce very different results depending on the piece and the finish you choose. Here are some ideas organized by room.
Living Room
- Coffee table from an old trunk. A vintage army trunk or steamer trunk becomes a storage coffee table. Add casters to the bottom for easy movement. Paint it a bold color or leave the patina for a rustic look.
- Media console from a dresser. Remove the top drawers and install shelf boards for electronics. Cut a hole in the back for cables. Paint it a dark tone like charcoal or navy for a modern feel.
Bedroom
- Headboard from an old door. An interior door laid horizontally behind your bed becomes an instant headboard. Sand it down and stain it to match your existing furniture. Add crown molding trim for extra detail.
- Nightstand from a stacking crate. Wooden crates from a craft store can be stacked and screwed together. Add a small shelf and a coat of paint. They are perfect for small spaces.
Kitchen and Dining
- Buffet from a sideboard. A vintage sideboard can be painted in two tones. Keep the body neutral and paint the drawer fronts a deeper shade. Swap out the handles for brass cup pulls.
- Island from a desk. An old office desk on locking casters becomes a portable kitchen island. Hang a towel bar on one side and add a butcher block top.
Entryway
- Shoe bench from a nightstand. A low nightstand with a drawer can hold shoes inside and provide a seat on top. Add a cushion to the top for comfort. Paint it a cheerful color to greet guests.
- Key holder from a picture frame. An old frame with the glass removed becomes a key holder. Add small hooks to the bottom rail. Paint it or leave the wood natural.
Common Upcycling Mistakes and How to Avoid Them
Even experienced DIYers make errors. This table shows frequent pitfalls and the smart way around them.
| Mistake | Why It Happens | How to Avoid It |
|---|---|---|
| Skipping the primer | Paint peels or wood stains show through | Always use a bonding primer, especially on glossy or stained surfaces |
| Using the wrong paint on upholstery | Paint cracks or feels stiff | Use fabric specific paint or a fabric medium mixed with latex paint |
| Not testing the color first | The final shade looks different than expected | Paint a small sample on the bottom of the piece or on a piece of cardboard |
| Forgetting to seal the topcoat | Paint chips off with regular use | Apply two coats of polyurethane or furniture wax for durability |
| Ignoring wood movement | Cracks form after painting | Allow wood to acclimate to your home for 48 hours before painting |
| Mismatched hardware spacing | New knobs do not fit the old holes | Measure center to center distance before buying new hardware |
Techniques to Make Your Upcycled Furniture Look Professional
You do not need a workshop full of tools to get high end results. These techniques will help your piece look polished.
- Color blocking. Use two or three complementary colors on different parts of the furniture. Paint the frame one color and the drawers another. Use painter’s tape to create clean lines.
- Stenciling. Add a pattern to drawer fronts or the top surface. Use a reusable stencil and a stiff stencil brush. Work with a small amount of paint and dab gently to avoid bleeding.
- Decoupage. Apply decorative paper or fabric to flat surfaces using Mod Podge. This works beautifully on the tops of tables or inside open shelves. Seal with a clear topcoat after the decoupage dries.
- Distressing. Sand edges and corners lightly after painting to let the original wood or paint show through. This gives a shabby chic or farmhouse look. Focus on areas that would naturally wear over time.
- Hardware swaps. Even the most basic dresser looks elevated with the right handles. Consider vintage brass, leather pulls, or ceramic knobs. Mix and match sizes for visual interest.
If you want to expand your skills further, check out this guide on transform your space with simple DIY wall art ideas for complementary projects that pair well with your upcycled furniture.
Tools and Materials to Keep On Hand
Before you start your first project, gather these basics. They will serve you well for any upcycling job.
- Sandpaper in medium (120 grit) and fine (220 grit)
- Tack cloth for wiping away dust
- High quality water based primer
- Chalk paint or latex paint in your chosen colors
- Paintbrushes (angled sash brush and foam roller)
- Painter’s tape
- Clear polyurethane or furniture wax
- Screwdriver set for removing and installing hardware
- Wood glue and clamps for repairs
With these tools, you can handle most projects. Add a power sander if you plan to do many pieces. It saves time and effort.
Real World Project: Turning a 1980s Dresser Into a Modern Bar Cart
Let us walk through a specific example. You find a laminate dresser from the 1980s. It has brass toned handles and a faux wood finish. The shape is good. Here is how you transform it.
Start by removing all drawers and hardware. Clean every surface with a degreaser. Lightly sand the laminate to help the primer adhere. Apply two coats of bonding primer. Let each coat dry for at least two hours.
Paint the body of the dresser a deep emerald green. Paint the drawer fronts a soft cream. Use a small roller for smooth coverage. Once the paint dries, replace the old brass handles with matte black bar pulls.
Remove the top two drawers entirely. Cut a piece of plywood to fit the opening and install it as a shelf. This creates a space for bottles and glasses. Add a wine rack insert if you want.
Finish with two coats of polyurethane on all surfaces that will see use. Let the piece cure for 48 hours before loading it up. Place it in your dining room or living area. It will hold cocktails and glassware with style.
For more storage solutions that work with small spaces, read this article on easy DIY storage solutions for small spaces. It pairs nicely with upcycled furniture projects.
Why Your First Piece Does Not Have to Be Perfect
Some people hesitate because they worry about making mistakes. That is part of the process. Your first upcycle might have a few brush strokes that show or a hardware hole that is slightly off. Those small imperfections give the piece character. They also teach you what to do differently next time.
Start with a simple piece. A small side table or a basic stool costs very little. If it does not turn out exactly as you imagined, you are only out a few dollars and some time. The skills you build will carry over to bigger projects.
How to Maintain Your Upcycled Furniture
Once you have created your masterpiece, take care of it. Dust regularly with a soft cloth. Avoid harsh chemicals that can strip the topcoat. Use coasters under drinks and felt pads under decor items. If a scratch appears over time, you can touch it up with leftover paint.
For pieces in high traffic areas, reapply a coat of wax or polyurethane every year or two. That keeps the finish looking fresh and protects your hard work.
Your Turn: Start Small and Build Confidence
You have the ideas. You have the steps. Now it is time to act. Look around your home or visit a local thrift store this weekend. Find one piece that speaks to you. It does not have to be a grand antique. A simple chair or a small table will do.
Spend an afternoon working through the process. Clean it, sand it, paint it, and add new hardware. Step back and admire what you made. That feeling of turning something forgotten into something beautiful is addictive.
Once you finish that first project, you will be ready for more. Try your hand at how to build a custom bookshelf without professional help to complement your new upcycled furniture. The skills overlap nicely.
The Real Reward of Upcycling Furniture
The best part of upcycling is not the money you save, though that is nice. It is the story behind each piece. When someone compliments your sideboard, you can say, “I found that at a garage sale for fifteen dollars. I painted it myself.” That feels good. It sparks connection. It shows that you do not need a big budget to have a home that reflects your personality.
So grab that old dresser. Pick a color that makes you smile. Give it a second chance. Your home will thank you.