Building a custom bookshelf adds personality and function to any space. You don’t need to be a professional carpenter to create a beautiful, sturdy piece that fits your style and needs. With some basic tools, a little patience, and clear instructions, you can craft a bookshelf that looks like it belongs in a showroom. Let’s walk through the process step-by-step so you can confidently build your own.
Building your own bookshelf is achievable with simple planning, measuring, cutting, and assembly. Focus on your space, select your materials wisely, and follow a clear plan to create a custom piece that suits your style and storage needs perfectly.
Planning Your Custom Bookshelf
Before you start cutting wood or assembling anything, take time to plan. Think about where the bookshelf will go, what size it should be, and how many shelves you want. Sketching your design helps visualize the final product. Measure the space where you want the bookshelf to sit, noting height, width, and depth. Decide whether you want a simple open design or something more intricate with decorative trim.
Make a list of what you need. Common materials include plywood or solid wood planks, screws, nails, wood glue, sandpaper, and paint or stain. Pick a style that matches your decor—modern, rustic, or vintage.
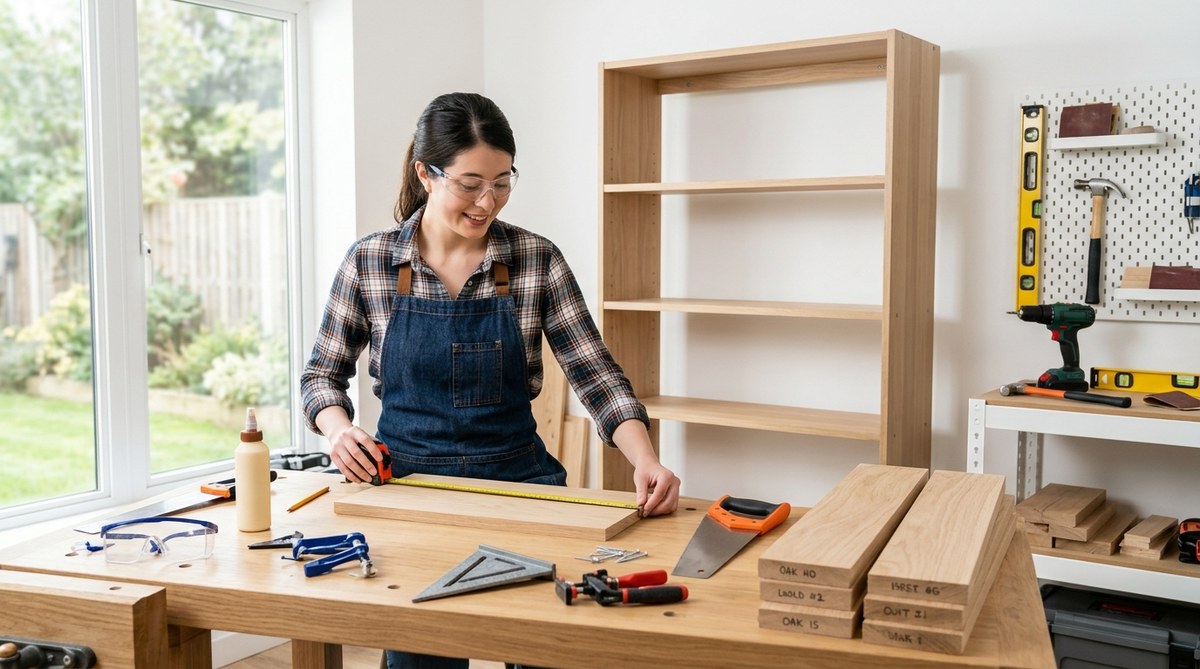
Gathering Materials and Tools
Here’s what you’ll need for most DIY bookshelves:
- Plywood or solid wood planks
- Measuring tape
- Saw (hand saw or power saw)
- Drill and drill bits
- Screwdriver
- Clamps
- Sandpaper or electric sander
- Paint, stain, or sealant
- Level
- Pencil
- Safety glasses and gloves
Having the right tools and materials ready will make the project smoother and more enjoyable. If you’re unsure about any step, check tutorials on building with basic tools.
Step-by-Step Process to Build Your Bookshelf
1. Measure, Mark, and Cut
Start by measuring your wood according to your design. Use your pencil to mark where to cut. For example, if your shelves are 36 inches long, mark and cut the plywood accordingly. Remember to add extra for allowances if you plan to add trim or decorative features.
Use a saw to make clean, straight cuts. Keep safety in mind and wear glasses. For best results, clamp the wood securely and cut slowly.
2. Assemble the Frame
Begin by constructing the outer frame. Attach the vertical sides to the bottom shelf using screws or nails. Apply wood glue for extra sturdiness. Use clamps to hold pieces tightly while the glue dries. Once the frame is stable, attach the top piece.
If your design includes dividers or additional supports, measure and cut those now. Secure everything with screws, ensuring the structure is square by checking with a level.
3. Add Shelves and Supports
Position the shelves at your desired heights. Use a level to ensure they’re perfectly horizontal. Secure each shelf with screws or brackets underneath. For adjustable shelves, drill holes at regular intervals along the sides and insert shelf pins.
4. Finish and Decorate
Sand all surfaces thoroughly to remove splinters and rough edges. Finishing touches can include staining, painting, or sealing your bookshelf. For a more polished look, consider adding decorative trim or molding.
Finally, anchor your bookshelf to the wall if necessary. This adds safety, especially in homes with children or pets.
Common Techniques and Mistakes to Avoid
| Technique | What to Do | Common Mistakes |
|---|---|---|
| Measuring | Use a tape measure for accurate dimensions | Rushing measurements leads to uneven shelves |
| Cutting | Use a saw with a guide for straight cuts | Cutting without support causes crooked edges |
| Assembly | Clamp pieces tightly before screwing | Skipping glue reduces stability |
| Finishing | Sand thoroughly before applying paint or stain | Rushing finish causes rough surfaces |
Expert advice: “Take your time at each step. Precise measurements and careful assembly ensure your bookshelf will be both beautiful and sturdy.”
Tips for a Successful DIY Bookshelf
- Always double-check your measurements before cutting.
- Use clamps to hold pieces steady while working.
- Sand each piece thoroughly for a smooth finish.
- Choose paints or stains that complement your room.
- Consider adding adjustable shelves for flexibility.
- Keep your workspace clean and organized.
Making It Your Own
Don’t shy away from adding personal touches. Incorporate decorative brackets, paint in bold colors, or add backing panels for a finished look. If you want to give your bookshelf a rustic feel, distress the paint or stain for an aged look.
Remember, building your own bookshelf isn’t just about function. It’s about creating a piece that reflects your style and meets your needs.
Final Words on DIY Bookshelves
Building a custom bookshelf on your own is a rewarding project. It saves money, allows for complete customization, and gives you a sense of accomplishment. With patience and some basic skills, you can craft a beautiful, functional piece that fits perfectly in your space. Grab your tools, follow the steps, and enjoy the process of creating something uniquely yours. Happy building!