
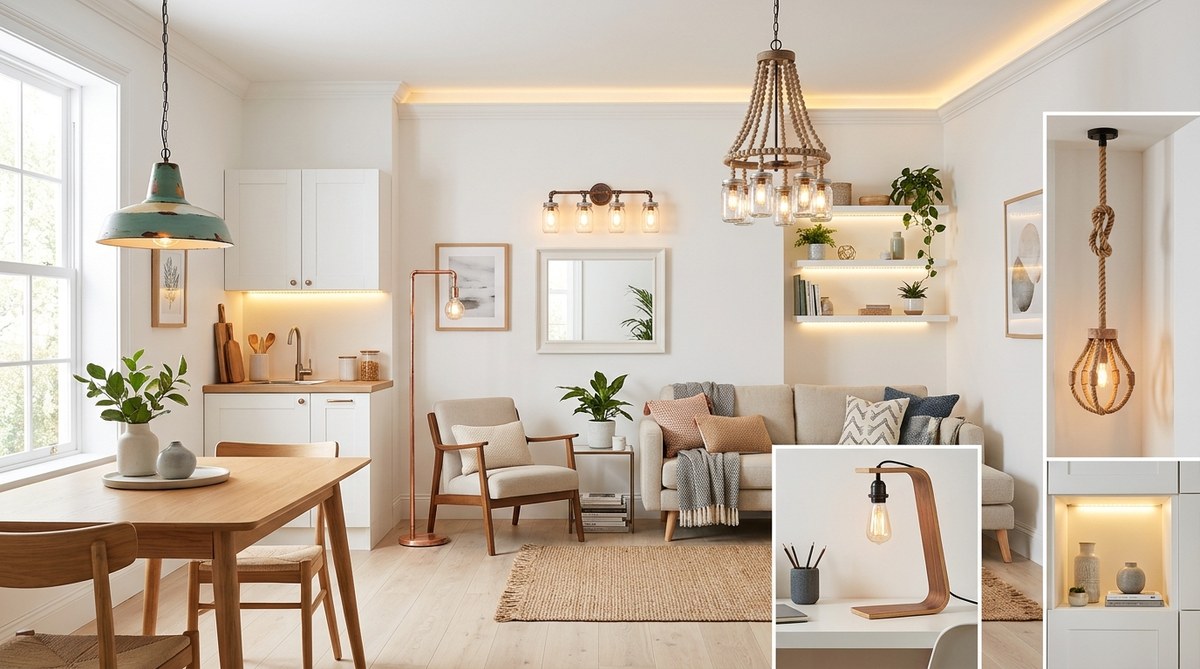
You do not need to be an electrician to transform the light in your home. A few simple upgrades can turn a dark, gloomy space into a warm, inviting room. And you do not have to spend a lot of money. With some basic tools and a little creativity, you can make a big difference. Whether you rent or own, these DIY lighting upgrades will help you feel more comfortable in your home. They are also a great way to save on energy bills. Let us look at ten projects that can brighten any room in 2026.
DIY lighting upgrades improve brightness, save money, and add personal style. Focus on layering light, using warmer bulbs, and adding dimmers. Clever projects like corner lamp upgrades, under-cabinet strips, and mirrored fixtures can transform any room without breaking your budget or needing professional skills.
Why DIY Lighting Upgrades Are a Smart Move in 2026
Lighting does more than let you see. It sets the mood, makes rooms feel larger, and even affects your sleep. In 2026, many homeowners are looking for affordable ways to improve their living spaces without major renovations. DIY lighting upgrades fit that need perfectly. They are budget friendly, easy to customize, and you can finish most projects in a weekend.
Renters also benefit. You can install temporary fixtures that do not damage walls or require permanent wiring. Things like plug-in pendant lights, adhesive LED strips, and smart bulbs let you take your upgrades with you when you move. It is a smart way to invest in comfort without losing your security deposit.
If you enjoy hands-on projects, these upgrades are a rewarding way to practice your skills. You might even discover a new hobby. And once you see how a small change in lighting can make your favorite reading chair more inviting or your kitchen counter more functional, you will want to tackle the next project.
10 Ingenious DIY Lighting Upgrades to Try This Year
Here are ten specific upgrades, each with a simple process you can follow. They start easy and get slightly more involved.
-
Swap out switch plates and outlet covers. Old, yellowed plastic covers make any light look dingy. Replace them with brushed nickel or white metal. It takes 10 minutes and costs less than $15 for a whole room.
-
Install plug-in under-cabinet LED strips. Kitchens and home offices get a huge boost from task lighting. Choose adhesive strips with a remote. Stick them under cabinets or shelves and plug them in. No wiring needed.
-
Add a dimmer switch to an existing lamp. Use a plug-in dimmer cord. It lets you adjust brightness without buying a new lamp. This one swap can change the whole atmosphere of a room.
-
Upgrade a floor lamp with a larger shade. Many floor lamps come with small, skimpy shades. A wider drum shade (12 to 14 inches) will diffuse light better and illuminate more of the room.
-
Create a DIY picture light with a clip-on spotlight. Buy a small adjustable spotlight and clip it onto the top of a large framed art piece. Angle it downward. This adds a gallery feel and brightens a dark wall.
-
Build a simple shelf with integrated LED tape. Use a pine board and some LED tape with a diffuser channel. Run the wire down to a plug. The shelf provides display space and soft upward or downward light.
-
Replace a basic ceiling fan light kit. Many fan lights use a single bulb that casts harsh shadows. Swap the kit for a flush-mount LED panel or a multi-light fixture. This project requires turning off the breaker, but it is straightforward.
-
Turn a mirror into a light source. Add an LED strip around the back perimeter of a large mirror. The light bounces off the wall and creates soft ambient glow. Great for bedrooms or hallways.
-
Convert a mason jar into a hanging pendant. Use a pendant light kit from a hardware store. Drill a hole in the jar lid, thread the cord through, and screw in a vintage Edison bulb. Hang it over a kitchen island or reading nook.
-
Install smart bulbs with motion sensors. Place them in entryways, closets, or bathrooms. They turn on when you walk in and turn off after you leave. This saves energy and adds convenience.
Expert tip from a home improvement blogger: “When choosing LED strips, look for a high Color Rendering Index (CRI) of 90 or above. It makes colors look natural and reduces eye strain. Cheap strips with low CRI can make everything look washed out.”
Common Mistakes to Avoid with DIY Lighting Upgrades
Even easy projects can go wrong. The table below lists the most frequent errors and how to fix them.
| Mistake | Consequence | Fix |
|---|---|---|
| Using cool white bulbs in living areas | Harsh glare, uninviting feel | Pick soft white (2700K-3000K) for bedrooms and living rooms. |
| Skipping the voltage check on LED strips | Flickering or burnt out strips | Always match the driver voltage to the strip. Read the label. |
| Installing dimmers without checking bulb compatibility | Lights buzz or flicker | Look for bulbs marked “dimmable” and use an LED-rated dimmer switch. |
| Overloading a single outlet with multiple plug-in fixtures | Tripped breakers or fire risk | Use a power strip with a built-in breaker or spread fixtures across different outlets. |
| Cutting wiring without turning off power | Shock or damage | Use a non-contact voltage tester before touching any wires. |
Essential Tools for Your DIY Lighting Toolkit
Having the right tools makes every project easier. Here is a short list of items you should keep handy:
- Non-contact voltage tester (vital for safety)
- Wire strippers and cutters
- Screwdriver set (Phillips and flathead)
- Fish tape or flexible glow rod for running wires
- Drill with assorted bits
- Small level
- Tape measure
- Hot glue gun (for securing strips temporarily)
If you are new to wiring, start with plug-in projects. You can build skills without dealing with live circuits. For more guidance, check out the guide on top 10 essential tools for successful DIY home projects. It covers everything you need to build a strong toolkit.
How to Choose the Right Bulbs and Fixtures
Picking the right bulb is just as important as the fixture. Keep these points in mind:
- Color temperature is measured in Kelvins. 2700K gives a warm yellowish glow. 4000K is neutral white, good for kitchens. Avoid 5000K+ in living spaces.
- Lumens measure brightness. For reading, aim for 800 to 1100 lumens per lamp.
- Beam angle matters for focused light. A narrow beam (25 degrees) works for accent lighting. Wide beams (120 degrees) spread light evenly.
- Fixture style should match the room. A rustic metal pendant looks great in a farmhouse kitchen, while a sleek track light fits a modern office.
When you decorate around your new lights, you can also explore transform your space with simple DIY wall art ideas to tie the look together.
Plan Your DIY Lighting Upgrade Weekend
The best way to get started is to pick one room and one upgrade. Maybe you start with the under-cabinet strips in your kitchen. Or you change the shades on your living room lamps. Once you finish that project, you will have the confidence to move on.
Think about how you use each room. Do you cook, read, watch TV, or work? Each task needs a different kind of light. Layering is the secret. Use overhead lights for general illumination, task lights for specific activities, and accent lights to highlight decor.
Do not forget about energy savings. LED bulbs use 80% less electricity than incandescent ones. They also last years longer. Switching every bulb in your home to LED is one of the best DIY lighting upgrades you can do.
If you want to combine lighting with other home improvements, look at 5 budget-friendly DIY projects to upgrade your home this season. It has ideas that pair well with new lighting.
Your home should feel like a place where you can relax and recharge. Good lighting is a big part of that. Take one weekend, gather your tools, and try one of the upgrades above. You will be surprised at how much a little change can lift your spirits and make your space feel brand new.