
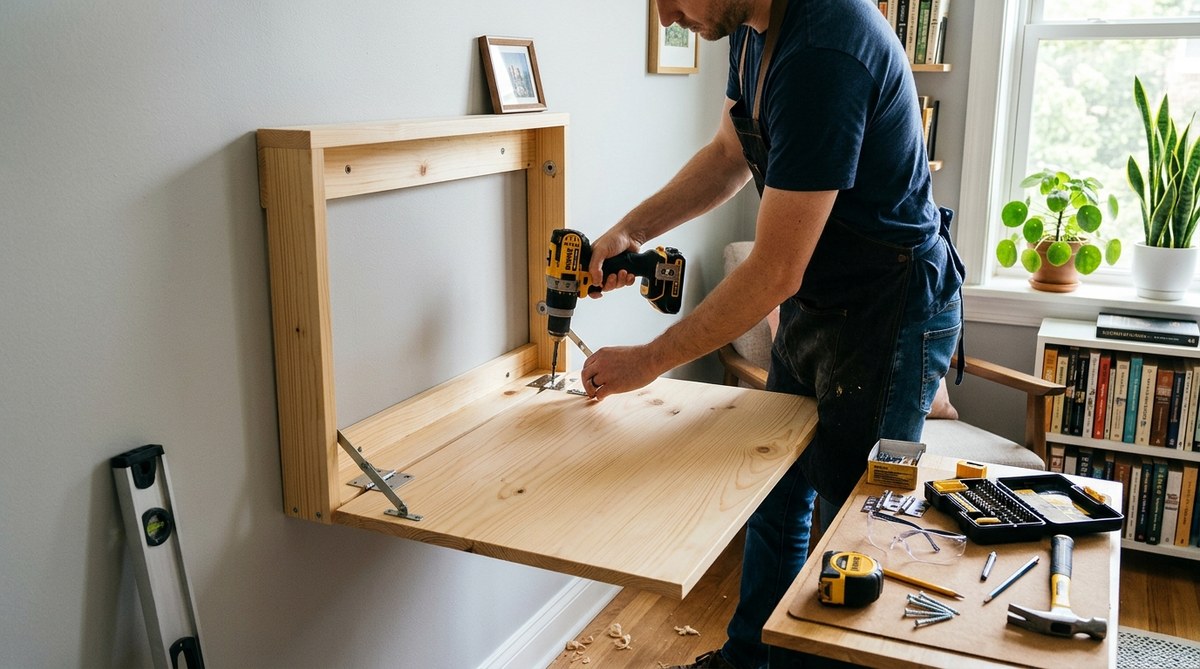
Your apartment is small. You need a workspace, but a full desk would eat up half your living room. A fold down desk solves that problem without making you sacrifice style or comfort. It mounts to the wall, flips up when you need it, and folds flat when you don’t. You can build one yourself in a single afternoon with basic tools and a trip to the hardware store. No complicated joinery. No expensive materials. Just a solid, functional desk that disappears when your workday ends.
You can build a sturdy, wall-mounted fold down desk for under $60 in about four hours. The secret is using a piano hinge and a folding support bracket rated for at least 50 pounds. Measure twice, cut once, and always anchor into wall studs. This project reclaims floor space without sacrificing function, and it works for renters too since the damage is limited to a few screw holes.
Why a Fold Down Desk Works for Tiny Spaces
A standard desk takes up about 10 square feet of floor space. In a studio apartment or tiny house, that is a lot of real estate. A wall-mounted fold down desk uses zero floor space when closed. When open, it provides the same surface area as a traditional desk. This makes it ideal for renters, van dwellers, and anyone working with a tight footprint.
The design is simple. A desktop is attached to a wall cleat with a hinge. When not in use, the desk folds down and rests flush against the wall. Support arms or folding brackets hold it level when open. You can add a small shelf above for storage, or keep it completely minimal.
Tools and Materials You Will Need
Gather everything before you start. This keeps the project moving and prevents mid-build trips to the store.
Tools
- Circular saw or jigsaw
- Drill with driver bits
- Tape measure
- Level
- Stud finder
- Sandpaper or orbital sander
- Clamps (optional but helpful)
Materials
- 3/4 inch plywood (one sheet will yield multiple desktops)
- 2×4 lumber for the wall cleat
- Piano hinge (at least 18 inches long)
- Two folding shelf brackets rated for 50+ pounds each
- Wood screws (2 inch and 1.5 inch)
- Wall anchors if you cannot hit a stud
- Wood glue
- Paint or stain and a brush
If you are new to woodworking, check out the Top 10 Essential Tools for Successful DIY Home Projects to make sure your toolbox is ready.
Step by Step Build Process
1. Measure Your Space and Cut the Desktop
Decide where you want the desk. A good height is 28 to 30 inches from the floor, which works for most people sitting in a standard chair. Measure the width of the wall space. A 36 inch wide desk is comfortable for a laptop and a notebook. A 48 inch desk gives you room for a monitor.
Cut your plywood to size. For a 36 inch wide desk, cut it 36 inches wide and 20 inches deep. Sand the edges smooth. Round over the front corners with sandpaper or a router if you want a softer look. Paint or stain the desktop now. It is easier to finish it before installation.
2. Build the Wall Cleat
The wall cleat is a 2×4 that attaches to the wall studs. It supports the back edge of the desktop and gives the hinge something solid to bite into. Cut a 2×4 to the same width as your desktop. For a 36 inch desk, cut the cleat to 36 inches.
Find the studs in your wall with a stud finder. Mark their locations. Hold the cleat against the wall at your desired height. Use a level to make sure it is straight. Drill pilot holes through the cleat and into the studs. Secure the cleat with 3 inch wood screws. If you cannot hit a stud, use heavy duty wall anchors rated for at least 50 pounds.
3. Attach the Piano Hinge
Lay the desktop face down on a flat surface. Place the piano hinge along the back edge. The hinge barrel should sit right at the edge of the desktop. Screw the hinge into the desktop using the screws that came with the hinge. Make sure the screws are short enough that they do not poke through the top surface.
Now lift the desktop and line up the other half of the hinge with the wall cleat. Have a helper hold the desktop level while you screw the hinge into the cleat. Check the level one more time before tightening everything down.
4. Install the Folding Brackets
Folding shelf brackets support the front edge of the desk when it is open. They fold flat against the wall when the desk is closed. Position one bracket near each front corner. Mark the screw holes. Drill pilot holes and attach the brackets to the bottom of the desktop.
Test the motion. The desk should fold up and down smoothly. If it binds, loosen the hinge screws slightly and adjust.
5. Add a Locking Mechanism (Optional)
A small hook and eye latch or a cabinet lock can hold the desk closed when not in use. This is useful if you live in a high traffic area or have pets. Install the latch on the bottom of the desktop and a matching eye on the wall cleat.
Common Mistakes and How to Avoid Them
| Mistake | Why It Happens | How to Fix It |
|---|---|---|
| Desk sags in the middle | Brackets are too weak or spaced too far apart | Use brackets rated for 100 pounds total, or add a third bracket in the center |
| Desktop hits the wall when folding | Hinge is too far from the wall | Mount the hinge so the barrel sits right at the back edge of the desktop |
| Screws strip out in plywood | Pilot hole is too small or too large | Use a pilot hole that matches the screw diameter, and avoid overtightening |
| Desk is not level | Wall cleat was installed without a level | Remove the cleat, recheck your level, and reinstall |
| Brackets do not fold flat | Brackets are the wrong type | Use folding shelf brackets, not fixed angle brackets |
Finishing Touches for a Polished Look
A coat of paint or stain makes the desk look like a built-in piece of furniture. Match the color to your existing trim or go with a contrasting accent color. Polyurethane adds durability and makes cleaning easier.
You can add a small shelf above the desk for a lamp or plants. Check out Transform Your Space with Simple DIY Wall Art Ideas for ways to personalize the area above your new desk.
Cable management is often overlooked. Attach a small cable raceway to the bottom of the desktop. Run your cords through it so they stay hidden when the desk is folded down. This keeps the wall clean and prevents cords from getting pinched in the hinge.
How This Desk Holds Up for Daily Use
A properly built fold down desk can handle a laptop, a monitor, books, and a coffee mug without wobbling. The key is the quality of your brackets and the strength of your wall attachment. If you are using it for heavy equipment like a desktop computer or a printer, upgrade to brackets rated for 150 pounds and use longer screws into the studs.
“I built one of these for my son’s tiny bedroom. He uses it for homework and gaming. Two years later, it is still rock solid. The secret is spending the extra few dollars on good brackets.” – Tom, DIY builder from Portland
For renters, this project is low risk. When you move out, you can remove the desk and patch the screw holes with spackle. The landlord will never know it was there.
Alternatives to the Standard Design
You can modify this basic design to fit your needs.
- Corner desk: Build two desktops that meet at a corner. Use separate cleats and hinges for each side.
- Standing desk: Mount the cleat at 42 inches high. Add a tall stool if you need to sit.
- Built-in storage: Add a shallow cabinet below the desk that opens when the desk is folded down.
- Writing slope: Cut the desktop at a slight angle for drawing or calligraphy.
If you want more ideas for maximizing your space, read about Easy DIY Storage Solutions for Small Spaces.
Your One Afternoon Timeline
Here is how the build breaks down:
- First hour: Measure the space, cut the plywood, and sand the edges.
- Second hour: Paint or stain the desktop. While it dries, cut and install the wall cleat.
- Third hour: Attach the hinge and brackets. Mount the desktop.
- Fourth hour: Test the motion, add the latch, and clean up.
That is a complete desk in one afternoon. You will have a functional workspace by dinner time.
Make This Desk Your Own
This is a starting point. You can customize the size, color, and hardware to match your style. Add a magnetic strip for tools or a small whiteboard on the wall above. The beauty of a DIY project is that you control every detail. You do not have to settle for what the store sells.
Grab your tape measure and get started. Your small apartment deserves a workspace that works for you, not against you. Build it this weekend.