
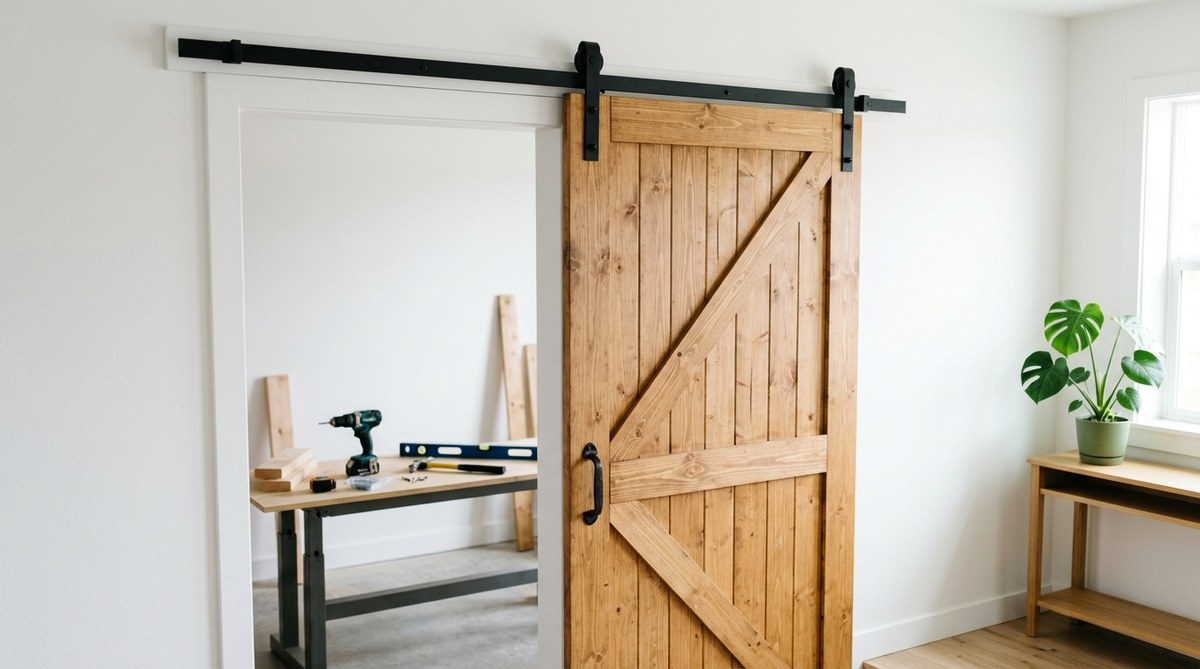
A sliding barn door can change the entire feel of a room without eating up floor space like a traditional swing door. The problem is that pre-made kits and custom builds often cost $400 or more. That price tag can make you second-guess the whole project. But here is the truth: you can build a beautiful, fully functional sliding barn door for under $150 with basic tools and a trip to the hardware store. This guide walks you through every step so you get the look you want without breaking the bank.
Building a sliding barn door for under $150 is absolutely doable if you plan your materials carefully. You need a solid wood door slab, a basic sliding door hardware kit, a saw, a drill, and some sandpaper. The biggest savings come from making the door yourself instead of buying a pre-finished one. With patience and the steps below, you can finish this project in a weekend and save hundreds of dollars.
Gather Your Materials and Tools
Before you cut anything, get your supplies in order. This is where you will save the most money. A pre-made barn door from a big box store can cost $200 to $500 just for the door. You can build the same thing for a fraction of that.
What you need for the door:
- One sheet of 3/4-inch sanded plywood (4×8 feet). A standard sheet costs around $45 to $55.
- One 1×4 pine board (8 feet long) for the frame.
- One 1×6 pine board (8 feet long) for the center trim detail.
- Wood glue and 1 1/4-inch brad nails.
- Sandpaper (80, 120, and 220 grit).
- Primer and paint or stain.
What you need for the hardware:
- A sliding barn door hardware kit. You can find basic kits for $40 to $60 online or at a hardware store. Look for one that includes a rail, hangers, a floor guide, and stoppers.
- 2-inch screws for mounting the rail to the wall studs.
- A stud finder.
Tools you will need:
- Circular saw or table saw.
- Drill and drill bits.
- Tape measure.
- Level.
- Safety glasses and ear protection.
Pro tip: Check the clearance section of your local lumber yard for plywood sheets with minor scratches. You can sand and paint over them, and they often cost half the price of a perfect sheet.
Step 1: Build the Door Slab
The door itself is the centerpiece. You will build a simple, sturdy slab that looks like a custom piece.
-
Cut the plywood. Measure the height of your door opening. Your door should be about 1 inch taller and 2 inches wider than the opening to ensure proper coverage. Cut the plywood sheet to those dimensions using your circular saw. For a standard 30-inch wide opening, aim for a door that is 32 inches wide by about 81 inches tall.
-
Cut the frame pieces. Take the 1×4 board and cut two pieces to the height of your door. Cut two more pieces to the width of the door minus 3 inches (to account for the side pieces). These will form a frame on the front face of the plywood.
-
Cut the center detail. Take the 1×6 board and cut it to the height of your door. This piece will run down the center of the door to give it that classic barn door look.
-
Assemble the door. Apply wood glue to the back of the frame pieces and attach them to the plywood using brad nails. Attach the top and bottom frame pieces first, then the side pieces. Finally, attach the center 1×6 piece. Wipe away any excess glue.
-
Sand everything. Start with 80-grit sandpaper to remove any rough edges. Move to 120 grit, then finish with 220 grit for a smooth surface. Pay extra attention to the corners.
-
Prime and paint. Apply a coat of primer and let it dry. Then paint or stain the door in your chosen color. Two coats of paint usually do the job.
Step 2: Install the Hardware Rail
The rail is the metal track that the door slides on. Getting it level is critical.
-
Find the studs. Use a stud finder to locate the wall studs above the door opening. Mark them with a pencil. You need to screw the rail into at least two studs for safety.
-
Measure and mark. Hold the rail above the door opening. The rail should be about 3 to 4 inches above the top of the door frame. Use a level to make sure the rail is perfectly horizontal. Mark the screw holes through the rail onto the wall.
-
Drill pilot holes. Drill pilot holes at your marks. This prevents the wood from splitting and makes driving the screws easier.
-
Mount the rail. Place the rail over the pilot holes and drive the 2-inch screws through the rail into the studs. Tighten them firmly but do not overtighten.
-
Install the end caps and stoppers. Most hardware kits include small stoppers that slide onto the ends of the rail. Follow the kit instructions to attach them. These prevent the door from rolling off the track.
Step 3: Attach the Hangers to the Door
The hangers are the brackets that hold the door and allow it to slide.
-
Measure the hanger placement. The hangers need to be centered on the top edge of the door. Measure the width of the door and divide by two. Mark the center point on the top edge.
-
Attach the hangers. Place the hangers on the top edge of the door, centered on your mark. Most hangers have pre-drilled holes. Use the screws from your kit to attach them securely.
-
Add the floor guide. The floor guide is a small bracket that keeps the bottom of the door from swinging. Measure the center of the door bottom and mark the floor. Drill a pilot hole and screw the floor guide into the floor. If you have tile or hardwood, use a masonry bit first.
Step 4: Hang the Door
This is the moment of truth.
-
Lift the door into place. With a helper, lift the door and set the hangers onto the rail. The hangers should slide onto the track easily.
-
Adjust the height. Most hangers have a small adjustment screw that lets you raise or lower the door slightly. Adjust it so the door clears the floor by about 1/2 inch. A standard door needs a gap of about 1/2 to 3/4 inch from the floor.
-
Test the slide. Push the door gently along the rail. It should move smoothly. If it sticks, check that the rail is level and the floor guide is aligned.
Common Mistakes and How to Avoid Them
Even experienced DIYers make mistakes. Here is a table of the most common issues and the simple fixes.
| Mistake | Why It Happens | How to Fix It |
|---|---|---|
| Door hits the floor | Rail mounted too low or hangers not adjusted | Raise the rail or adjust the hanger bolts |
| Door wobbles when sliding | Floor guide not aligned with the door center | Re-measure and move the floor guide |
| Rail screws pull out of drywall | Screws missed the studs | Use toggle bolts or move the rail to hit the studs |
| Paint chips on edges | No primer or sanding skipped | Sand the edges lightly and apply a fresh coat of primer |
| Door is too heavy for the kit | Used solid hardwood instead of plywood | Stick to the plywood and pine frame design |
Budget Breakdown
Here is exactly where your money goes. Prices are based on 2026 averages at major home improvement stores.
- Sanded plywood sheet: $50
- 1×4 pine board: $8
- 1×6 pine board: $10
- Wood glue and brad nails: $8
- Sandpaper pack: $5
- Primer and paint: $20
- Sliding door hardware kit: $45
- Screws and misc supplies: $4
Total: $150
If you already own a saw and a drill, you are right at the $150 mark. If you need to buy those tools, add about $60 for a basic circular saw and $40 for a drill. Even with tool costs, you are still well under the price of a pre-built door.
Customize Your Door Without Adding Cost
You do not have to stick with a plain flat door. Here are a few ways to personalize the design without spending extra money.
- Use a different center detail. Instead of a 1×6 board, use two 1×3 boards with a gap between them for a modern look.
- Add a diagonal cross brace. Cut two 1×4 pieces at 45-degree angles and attach them in an X pattern on the door face.
- Stain instead of paint. A can of stain costs about the same as paint and gives a warmer, natural wood look.
- Use reclaimed wood. If you have old pallets or fence boards, you can build the door frame from them for free.
If you want more ideas for customizing your home on a budget, check out 5 budget-friendly DIY projects to upgrade your home this season.
When to Upgrade the Hardware
The $45 hardware kit works great for a standard interior door. But there are two situations where you should spend a little more.
- Heavier doors. If you use solid wood instead of plywood, buy a heavy-duty kit rated for 200 pounds or more.
- High-traffic areas. For a door that will be used dozens of times a day, look for a kit with sealed ball bearings in the rollers. They last longer and slide more quietly.
For most bedrooms, pantries, and closets, the basic kit is perfectly fine.
Your Weekend Plan
Here is a simple schedule to get this done in two days.
Saturday morning: Buy all materials. Cut the plywood and frame pieces. Assemble the door.
Saturday afternoon: Sand the door. Apply primer and the first coat of paint. Let it dry overnight.
Sunday morning: Apply the second coat of paint. Install the rail on the wall.
Sunday afternoon: Attach the hangers to the door. Hang the door and install the floor guide. Adjust the height and test the slide.
You will have a finished sliding barn door by Sunday evening.
Make It Last
A well-built barn door should last for years. A few simple habits will keep it looking and working like new.
- Wipe the rail clean every few months. Dust and pet hair can build up and make the rollers stick.
- Tighten the screws on the hangers once a year. They can loosen slightly from regular use.
- Touch up paint or stain as needed. Keep the leftover paint in a labeled jar for easy fixes.
If you are new to DIY projects, you might also find it helpful to read about master basic home repairs to save money and increase safety. It covers the essential skills every homeowner should know.
Why This Project Is Worth Your Weekend
Building a sliding barn door for under $150 is not just about saving money. It is about getting exactly the door you want. You choose the color, the style, and the finish. No settling for whatever is in stock at the store. Plus, you gain the satisfaction of pointing at that door and knowing you built it yourself. That feeling does not cost a thing.
Grab your tape measure, pick out a paint color, and get started. Your room will feel bigger, your wallet will thank you, and you will have a new skill under your belt.