
Your nightstand has become a tangled mess of black cables, bulky charging bricks, and blinking lights. You are not alone. Every evening you reach over to plug in your phone, and you have to push aside a pile of cords just to close the drawer. It is frustrating, and it makes your bedroom look messy.
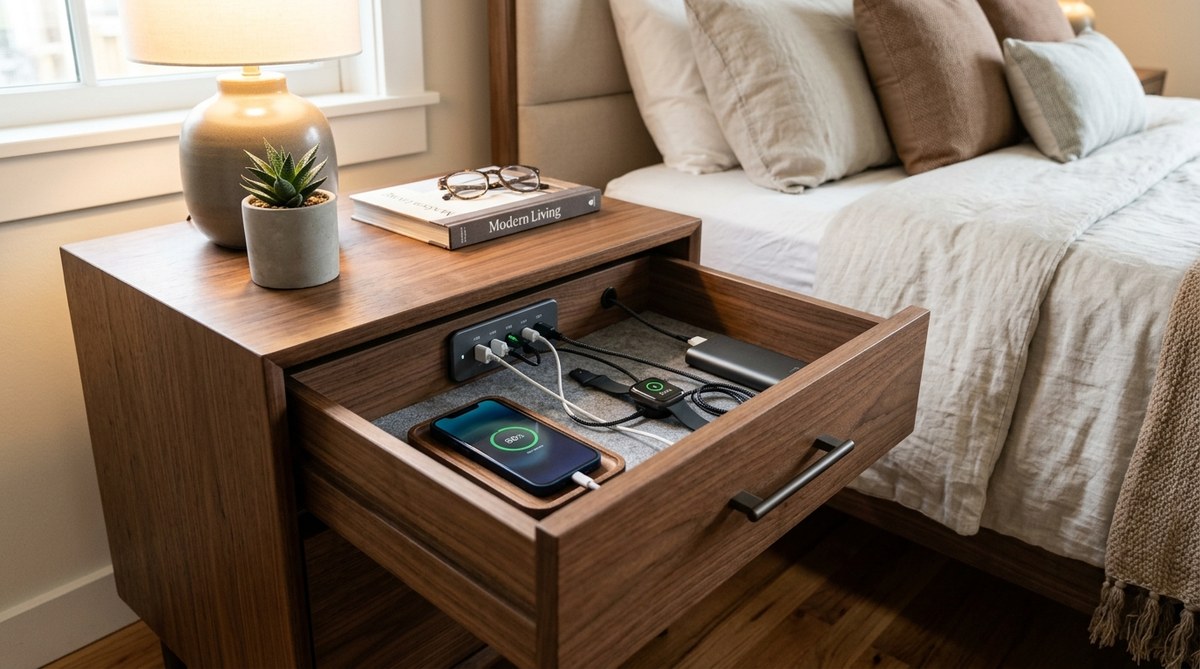
A hidden charging station nightstand drawer solves all of that. It keeps your devices charged and your cables completely out of sight. You open one drawer, plug in your phone or tablet, and close it again. The mess disappears. This project is perfect for a weekend afternoon, and you do not need to be a master woodworker to pull it off.
You can convert any standard nightstand drawer into a hidden charging station using a power strip, a grommet, and a few basic tools. The project hides all cables, keeps devices safe, and adds a clean, modern look to your bedroom. Total cost is usually under $50, and you can finish it in one afternoon.
Why Hide Your Chargers Inside a Drawer?
A cluttered nightstand does more than just look bad. It makes your bedroom feel smaller and more stressful. When you wake up in the middle of the night and need to check the time, you do not want to knock over a phone or step on a charger.
Hiding everything inside a drawer gives you a few major benefits:
- Zero visible cables. No more ugly wires running across your nightstand.
- Extra surface space. You can use your nightstand for a lamp, a book, or a glass of water.
- Device safety. Your phone and tablet stay inside the drawer, protected from accidental drops or spills.
- Easy access. You still charge your devices normally. You just open the drawer, plug them in, and close it.
- Renter friendly. This project does not require cutting into walls or permanent modifications.
If you are looking for more ways to organize your home, check out these easy DIY storage solutions for small spaces. They pair perfectly with this project.
What You Will Need for This Project
Before you start cutting or drilling, gather your materials. Most of these items you probably already have around the house.
| Item | Purpose | Estimated Cost |
|---|---|---|
| Power strip (short cord) | Provides multiple outlets inside the drawer | $10 – $15 |
| 1.5 inch or 2 inch grommet | Creates a clean hole for cables to pass through | $3 – $5 |
| Drill with hole saw attachment | Cuts the hole for the grommet | $10 (if you need a bit) |
| Screwdriver or impact driver | Secures the power strip to the drawer | Already own |
| Cable clips or adhesive mounts | Keeps cords tidy inside the drawer | $5 |
| Measuring tape | Ensures accurate placement | Already own |
| Pencil | Marks your cut lines | Already own |
You will also want a power strip that has a short cord (around 3 feet). A long cord will create a bulky mess inside the drawer. If your nightstand is against the wall, you can run the cord out the back of the drawer and down behind the furniture.
Expert advice: Always choose a power strip with built-in surge protection. It costs a few dollars more, but it protects your phone and tablet from power spikes. Do not skip this step.
Step-by-Step Guide to Building Your Hidden Charging Station
Follow these steps in order. Each one builds on the last.
1. Empty and Measure Your Drawer
Pull the drawer completely out of the nightstand. Remove everything inside. Measure the interior width, depth, and height. Write these numbers down. You need to know exactly how much space you have for the power strip and your devices.
Most standard nightstand drawers are about 4 to 5 inches deep. That is enough room for a power strip and a phone lying flat.
2. Choose the Best Location for the Power Strip
Place the power strip inside the empty drawer. Decide where it should sit. The best spot is usually along the back wall or on the side. You want it close to where the cord will exit the drawer.
Use a pencil to mark the screw holes on the drawer bottom. Most power strips have keyhole slots for mounting. If yours does not, you can use heavy-duty adhesive strips instead.
3. Drill the Hole for the Cable Grommet
This is the most important step. You need to cut a hole that allows the power strip cord to exit the drawer cleanly.
- Measure the diameter of your grommet. It is usually 1.5 inches or 2 inches.
- Choose a spot on the back of the drawer, near the top edge. You want the cord to come out behind the nightstand, not through the front.
- Use a hole saw attachment on your drill. Cut straight through the wood. Go slowly to avoid splintering.
- Insert the grommet into the hole. It should snap in place firmly.
If you are not comfortable drilling into your furniture, you can run the cord over the top edge of the drawer. Just close the drawer carefully so the cord does not get pinched. The grommet method is much cleaner and more permanent.
4. Mount the Power Strip
Screw the power strip into the drawer bottom using the marks you made earlier. Make sure the screws are short enough that they do not poke through the bottom of the drawer. If you are using adhesive strips, press them firmly and let them set for a few minutes.
Route the power strip cord through the grommet hole. Plug it in behind the nightstand to test the fit.
5. Manage the Cables Inside the Drawer
Now you need to keep things tidy inside. Use cable clips or small adhesive mounts to hold charging cables along the sides of the drawer. This prevents them from tangling when you open and close the drawer.
- Run each cable along the edge of the drawer.
- Leave enough slack so you can easily plug in a device.
- Use a small cable tie to bundle any extra length.
If you have multiple devices, consider labeling each cable with a small piece of tape. It makes finding the right charger much easier in the dark.
6. Test the Drawer Movement
Slide the drawer back into the nightstand. Open and close it a few times. Make sure the power strip cord does not catch or bind. If it feels tight, adjust the placement of the grommet or the power strip.
Plug in a phone or tablet and close the drawer. The device should charge normally with the drawer fully closed. That is the goal.
Common Mistakes to Avoid
Even experienced DIYers make these errors. Here is what to watch for.
| Mistake | Why It Hurts | How to Fix It |
|---|---|---|
| Using a power strip with a long cord | Creates a tangled mess inside the drawer | Buy a short cord power strip (3 feet or less) |
| Drilling the grommet hole too low | The cord gets pinched when you close the drawer | Drill near the top edge of the back panel |
| Skipping surge protection | Risk of damage to your devices | Replace with a surge-protected power strip |
| Mounting the strip too close to the front | Blocks space for your devices | Place it along the back or side wall |
| Forgetting to measure drawer depth | Power strip or devices may not fit | Measure twice before buying anything |
Creative Upgrades for Your Hidden Charging Station
Once you have the basic setup working, you can take it a step further. These upgrades make the system even better.
Add a wireless charging pad. Place a Qi-compatible pad inside the drawer. You can set your phone on top of the drawer (if the wood is thin enough) or inside the drawer itself. The pad connects to the power strip and charges without any cable.
Install a motion-sensing LED strip. Stick a small LED strip along the inside edge of the drawer. It lights up automatically when you open the drawer at night. This makes it easy to find your phone without turning on the main light.
Build a custom divider. Use thin plywood or acrylic to create compartments inside the drawer. One slot for your phone, one for your tablet, one for your smartwatch. Everything stays organized.
Add a USB hub. If your power strip does not have USB ports, buy a small USB hub and plug it into the strip. It gives you dedicated ports for charging cables without needing bulky wall adapters.
For more inspiration, take a look at these 5 trendy DIY projects to try in 2026. They are all beginner friendly and add real value to your home.
How This Project Fits Into a Clutter-Free Bedroom
A hidden charging station is just one piece of the puzzle. If you are serious about decluttering your bedroom, consider tackling a few other projects at the same time.
- Organize your closet with how to organize your closet for maximum space and accessibility.
- Build a custom bookshelf using how to build a custom bookshelf without professional help.
- Create a dedicated space for your morning routine with simple steps to organize and maximize space in your living room.
Each small project builds on the last. Before you know it, your entire bedroom feels calmer and more organized.
Your Turn to Build
You now have everything you need to build a hidden charging station nightstand drawer. The materials are cheap, the tools are basic, and the whole project takes less than two hours. Start by pulling out your nightstand drawer and measuring it. Pick up a short power strip and a grommet on your next trip to the hardware store. Drill one hole, mount the strip, and route the cables. That is it.
When you close that drawer for the first time and see your nightstand completely clear of cables, you will wonder why you did not do this years ago. Your bedroom will look better, your devices will stay charged, and your mornings will start a little smoother.
Go ahead and give it a try. You have got this.