
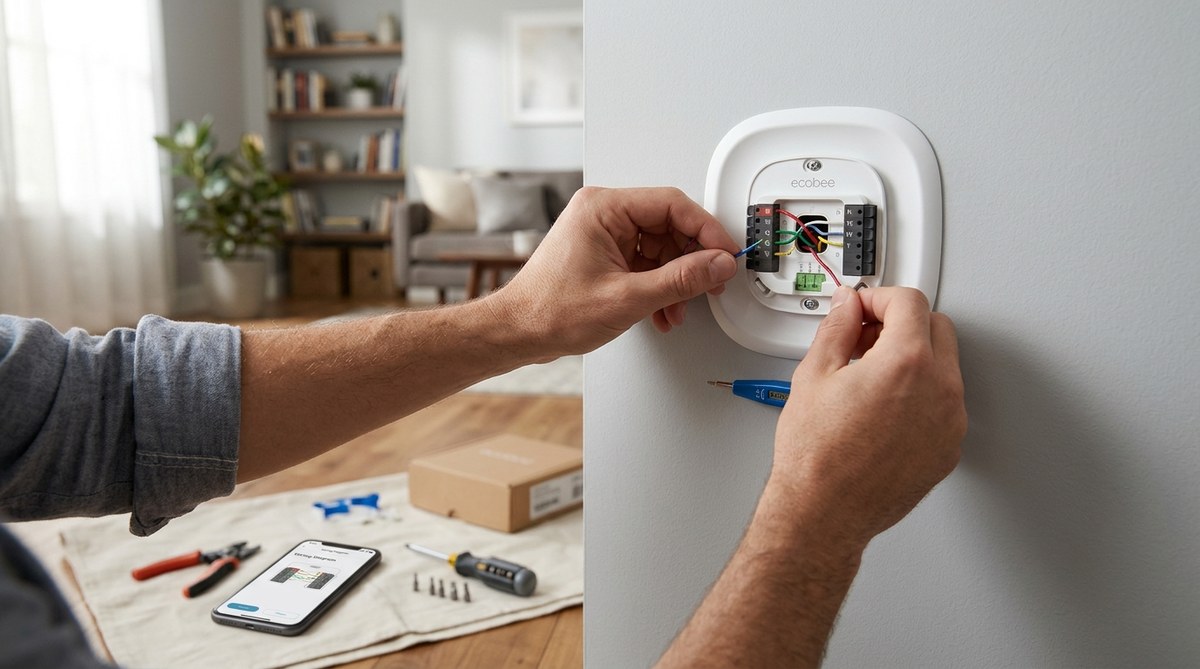
Installing a smart thermostat yourself is safe and doable if you check compatibility first, turn off the power, and match labeled wires. You can save $100 to $200 in labor costs. Most homeowners with basic DIY skills can finish the job in under an hour using just a screwdriver and a drill.
A smart thermostat can cut your heating and cooling bills by up to 10 percent each year. That savings adds up fast. But the idea of wiring one yourself makes a lot of people nervous. They picture a jumble of colored wires and a hefty electrician bill. The truth is simpler. If you can hang a picture frame or swap out a light switch, you can handle this project. You just need a clear plan and a little patience.
Let’s walk through how to install a smart thermostat without hiring an electrician. We’ll cover the tools you need, the compatibility check, the actual wiring steps, and what to do if things look different than expected.
Check Your System Before You Buy Anything
Not every home is ready for a smart thermostat right out of the box. The most important thing to verify is whether your current system has a C wire (common wire). Many older homes in the United States lack this wire. Without it, some smart thermostats won’t power on.
Here is what you need to check before making a purchase:
- System type: You need a low-voltage system. Most forced-air furnaces, boilers, and central air conditioners qualify. Heat pumps also work. If you have electric baseboard heat or a heat-only system, check the manufacturer’s list of compatible models.
- Voltage: Standard residential systems run on 24 volts. Your new thermostat should match that.
- Number of wires: Count the wires coming out of your wall. Two wires means a heat-only system. Four or five wires usually means you have both heating and cooling.
- C wire presence: Look for a wire labeled C, or a blue wire that isn’t connected to anything else. If you see one, you are in good shape.
If your home lacks a C wire, don’t panic. Many modern smart thermostats come with a power extender kit or a plug-in adapter. These devices let you install a smart thermostat without running new wires. Brands like Nest and Ecobee offer these kits. They are easy to install and cost far less than an electrician.
Gather the Right Tools
You probably own most of these already. That is part of the appeal of doing this yourself.
- A flathead screwdriver
- A Phillips head screwdriver
- A drill with a 3/16 inch bit (for wall anchors)
- A level (your phone has one built in)
- Painter’s tape and a marker
- A voltage tester or multimeter (optional but recommended)
That is it. No wire strippers needed. No crimping tools. Most smart thermostats use push-in connectors that grab the wire securely.
Turn Off the Power
This step is non-negotiable. Go to your main breaker panel and flip the switch that controls your HVAC system. If you are not sure which breaker that is, turn off the main breaker for the whole house. Then test your old thermostat to make sure it has no power. If the screen is dark and the system does not respond, you are safe to proceed.
Safety first: Treat every wire as if it is live until you confirm it is not. Use a voltage tester to check each wire before touching it. This simple habit prevents unpleasant surprises.
Remove the Old Thermostat
Pop the faceplate off your old thermostat. You will see screws holding a baseplate to the wall. Remove those screws and pull the baseplate away. Gently pull the wires out of the wall so you can see them clearly. Do not let the wires slip back inside the wall. Wrap them around a pencil or use painter’s tape to hold them in place.
Take a photo of the current wiring with your phone. This snapshot is your safety net. If you get confused later, you can refer back to it.
Label each wire with a small piece of painter’s tape. Write the terminal letter or color code on the tape. Common labels include R (red), W (white), Y (yellow), G (green), and C (blue or black). Your old thermostat might use different letters. That is fine. Just copy exactly what you see.
Install the New Baseplate
Most smart thermostats come with a new baseplate and a trim plate. Hold the baseplate against the wall and use a level to make sure it is straight. Mark the screw holes with a pencil. Drill pilot holes if needed, then insert the wall anchors. Screw the baseplate into place.
Connect the Wires
This is the part that looks intimidating but is actually straightforward. Smart thermostats use a terminal block with labeled push-in ports. Match each labeled wire from your wall to the corresponding port on the new baseplate.
Here is a typical mapping for a standard four-wire system:
| Old thermostat label | Common meaning | New thermostat port |
|---|---|---|
| R or Rh | Power (heating) | R or Rh |
| W or W1 | Heat call | W or W1 |
| Y or Y1 | Cool call | Y or Y1 |
| G or G1 | Fan | G or G1 |
| C or B | Common wire | C or B |
If your old thermostat used different letters, check the manual that came with your new thermostat. Most manuals include a compatibility chart. Follow that chart exactly.
Push each wire into its matching port until you hear a click. Give each wire a gentle tug to make sure it is locked in. If you need to remove a wire, use a small screwdriver to press the release tab next to the port.
Mount the Faceplate and Restore Power
Snap the faceplate onto the baseplate. It should click into place. Turn the breaker back on. Your thermostat should power up and guide you through the initial setup. This usually involves connecting to your home Wi-Fi network and answering a few questions about your system type.
If the thermostat does not power on, double check that the C wire is connected properly. If you do not have a C wire, install the power extender kit that came with your thermostat. Follow the kit’s instructions step by step. They are designed for DIY installation.
Common Mistakes and How to Avoid Them
Even experienced DIYers make errors. Here are the most common ones and how to steer clear of them.
- Skipping the compatibility check: You buy a thermostat that looks great but does not work with your system. Avoid this by checking the manufacturer’s compatibility tool online before purchasing.
- Forgetting to label wires: You pull the old thermostat off and suddenly have no idea which wire is which. Take that photo and use tape labels.
- Overtightening screws: Smart thermostats use plastic terminals. Tighten until snug, then stop. Cracking the terminal means a trip to the hardware store.
- Ignoring the level: A crooked thermostat drives you crazy every time you walk past it. Use a level, even if you think you have a steady hand.
- Not checking for a C wire alternative: If your system lacks a C wire, you can still install a smart thermostat using a power adapter. Do not assume you need to hire an electrician.
When to Call a Professional Anyway
This guide covers the vast majority of standard installations. But there are a few situations where calling an electrician is the smart move.
- Your system uses high voltage (120 volts or more).
- You see wires that look burnt or damaged.
- Your breaker panel is not labeled and you cannot safely isolate the HVAC circuit.
- You open the wall and find a nest of wires with no clear labels.
In those cases, the cost of a professional is worth the peace of mind. A licensed electrician can handle the job in under an hour, and their fee is still less than the cost of repairing a fried control board.
Make the Switch and Start Saving
Installing a smart thermostat without an electrician is one of the easiest ways to lower your energy bills and gain remote control over your home’s temperature. The whole process takes about 45 minutes. The tools are basic. The risk is low if you follow the steps in order.
If you run into a wall with an unusual wiring setup, remember that power extender kits exist. They solve the most common compatibility issue without requiring a professional. You can also check online forums or the manufacturer’s support line for help.
Once your new thermostat is live, take a few minutes to set up a schedule. Program it to lower the temperature while you are at work and warm things up before you get home. That simple habit is where the real savings come from.
Ready for your next project? You might enjoy mastering basic home repairs to save money and increase safety or trying out some 5 budget-friendly DIY projects to upgrade your home this season.
Own Your Home Comfort Without the Extra Cost
You do not need a license or a certification to install a smart thermostat. You need a screwdriver, a level, and the confidence to follow a simple process. Millions of homeowners have done this themselves. You can too. Save the electrician fee for a bigger project and enjoy the satisfaction of upgrading your home with your own two hands.