Your kitchen or bedroom drawer suddenly falls apart. The front hangs loose, the bottom sags, or the slide just won’t budge. It’s frustrating, but you can fix it yourself without calling a handyman. With a few basic tools and a little know-how, most drawer repairs take less than an hour. This guide shows you exactly how to assess the damage, choose the right fix, and get that drawer working smoothly again.
Most broken drawers can be fixed in under an hour with just a few basic tools and materials. Whether the front fell off, the slide is jammed, or the bottom panel gave way, you don’t need to call a pro. This guide covers the common failures and shows you exactly how to diagnose and repair each one. With step-by-step instructions and practical tips, you will save money and restore your furniture to the perfect working order.
Diagnose the Problem First
Before you grab any tools, pull the drawer out carefully and inspect it. The type of break tells you what approach to take. Here are the most common failures you will see in 2026:
- Drawer front separated from the box. Often happens with particle board that gets wet or with old glue that dried out.
- Slide is bent, broken, or misaligned. This makes the drawer stick, tilt, or refuse to close completely.
- Bottom panel fell out or sagged. Thin hardboard or particle board breaks under heavy loads.
- Side panel cracked or split. Usually at the screw holes where the slide attaches.
- Drawer face is loose or wobbly. The joint between the front and the sides has weakened.
| Problem | Likely Cause | Repair Method |
|---|---|---|
| Front detached | Glue failure / loose screws | Re glue and reinforce with screws or dowels |
| Drawer sticks or jams | Misaligned slides / debris | Clean slides, adjust alignment, or replace |
| Bottom panel sagging | Weak particle board | Replace with 1/4 inch plywood |
| Side crack at screw hole | Over tightened screws | Fill with wood filler and re drill pilot holes |
| Front panel wobbly | Loose joint | Add corner brackets or new screws |
Tools and Materials You Will Need
Most repairs use items you probably already own. If not, a quick trip to any hardware store will cover you.
- Wood glue (PVA type)
- Clamps (bar clamps or strap clamps work best)
- Screwdriver (Phillips and flathead)
- Drill with bits
- Measuring tape
- Sandpaper (fine grit, 120 to 180)
- Replacement slides (if needed)
- 1/4 inch plywood (for bottom replacement)
- Wood filler or epoxy putty
- Small finish nails or brads
- Corner brackets (optional)
Expert tip: Always measure your existing drawer before buying replacement slides. Check both length and side clearance. You do not want to find out the new slide is half an inch too long after you start drilling.
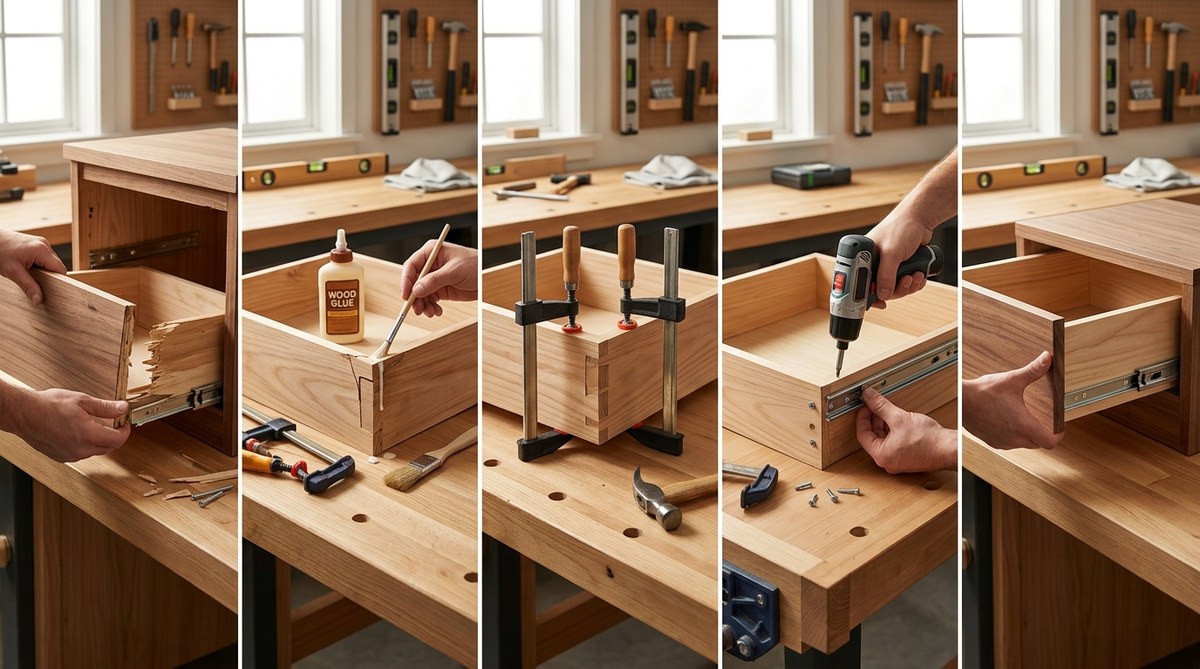
Step by Step Repair Process
Every broken drawer is different, but the following steps work for the vast majority of issues. Follow them in order.
1. Remove the Drawer and Clean the Area
Take the drawer out of the cabinet. If it uses side mounted slides, press the release levers on both sides and lift it free. If it uses wooden glides, just pull it straight out. Clear out any debris, dust, or old glue residue from both the drawer and the cabinet opening. A clean surface makes the repair hold better.
2. Assess the Damage and Gather Materials
Look at each joint, slide, and panel. Decide which of the common problems you have. Write down what you need. For example, if the bottom panel is broken, you will need a sheet of plywood and a saw. If the slide is bent, get a matching replacement.
3. Execute the Repair
Below are the specific procedures for each common issue.
Fixing a Detached Drawer Front
Apply a generous layer of wood glue to both surfaces. Press the front firmly against the drawer box. Clamp it in place and wipe away any squeeze out. Let the glue cure for at least two hours. For extra strength, drive a couple of finish nails through the front into the sides from the inside of the drawer, then set the nail heads and fill with wood putty.
Replacing a Sagging Bottom
Remove the old bottom by prying up the staples or nails. Use the old piece as a template to cut a new bottom from 1/4 inch plywood. Slide the new bottom into the groove or nail it to the bottom edges from underneath. Use glue and small brads for a secure fit.
Fixing a Stuck or Misaligned Slide
First, check if the slide is bent. If so, replace it with a new one of the same length and type. If the slide is just dirty, clean the rollers and tracks with a degreaser. Then adjust the mounting screws: loosen them slightly, nudge the slide left or right, and tighten again. Test the drawer several times until it glides smoothly.
Repairing a Cracked Side Panel
Clean the crack and inject wood glue deep into it. Clamp the side closed for one hour. After the glue dries, drill a new pilot hole for the slide screw about half an inch away from the old broken hole. Drive the screw in slowly to avoid splitting the wood again.
4. Reinstall the Drawer
Slide the drawer back into the cabinet carefully. For side mount slides, align the track with the cabinet rail and push until it clicks. For wooden glides, simply slide it in parallel. Open and close the drawer several times to check for smooth operation.
5. Final Adjustments
If the drawer still catches or gaps unevenly, adjust the slides or the front panel. Most modern slides have fine tuning screws on the side. Turn them to raise or lower the drawer front as needed. For a wobble, tighten the screws holding the front to the drawer box.
Common Mistakes to Avoid
Even experienced DIYers can make these errors. Read this list to save yourself a second repair.
| Mistake | Why It Hurts | Better Approach |
|---|---|---|
| Using nails instead of glue | Nails alone won’t hold particle board | Combine glue with screws or clamps |
| Over tightening screws | Strips the wood or particle board | Pre drill pilot holes and tighten gently |
| Failing to measure slides | Buying wrong size waste time and money | Measure from the front of the drawer to the back |
| Ignoring cabinet damage | Drawer can’t align if cabinet frame is out of square | Check cabinet level before focusing on drawer |
| Hurrying glue drying time | Joints fail under weight | Wait the full time recommended on the glue bottle |
When to Replace Instead of Repair
Not every broken drawer is worth saving. Consider replacing the entire drawer if:
- Parts of the particle board are swollen or crumbling from water damage.
- The drawer box has multiple cracks or broken joints.
- The drawer face is severely damaged and cannot be repaired cosmetically.
- Replacement slides are no longer available for an odd size.
In those cases, building a new drawer box from plywood or ordering a pre made replacement may be more cost effective than patching up a lost cause. If you enjoy building furniture, you can also learn how to build a custom bookshelf without professional help and apply those skills to drawermaking.
Finishing Touches That Make a Difference
Once the drawer works perfectly, take a minute to improve its look and longevity. Sand any rough edges on the bottom or sides. Apply a coat of furniture wax to the wooden runners to reduce friction. If you replaced the bottom, paint or stain it to match the original. A little extra effort now will keep the drawer working for years.
If you are working on more than one drawer, consider checking the slides on all of them. A preventive adjustment now can save you from a future breakdown. And if you find that you need to organize your space better, our guide on easy DIY storage solutions for small spaces pairs nicely with your newly repaired drawer.
Your Drawer Repaired and Your Confidence Boosted
Fixing a broken drawer is one of the most satisfying small home repairs you can tackle. You save money, avoid the hassle of calling a pro, and gain a skill that applies to dozens of similar problems around the house. The next time a drawer jams or a front falls off, you will know exactly what to do. Grab your glue, your clamps, and your screwdriver. You have got this.