
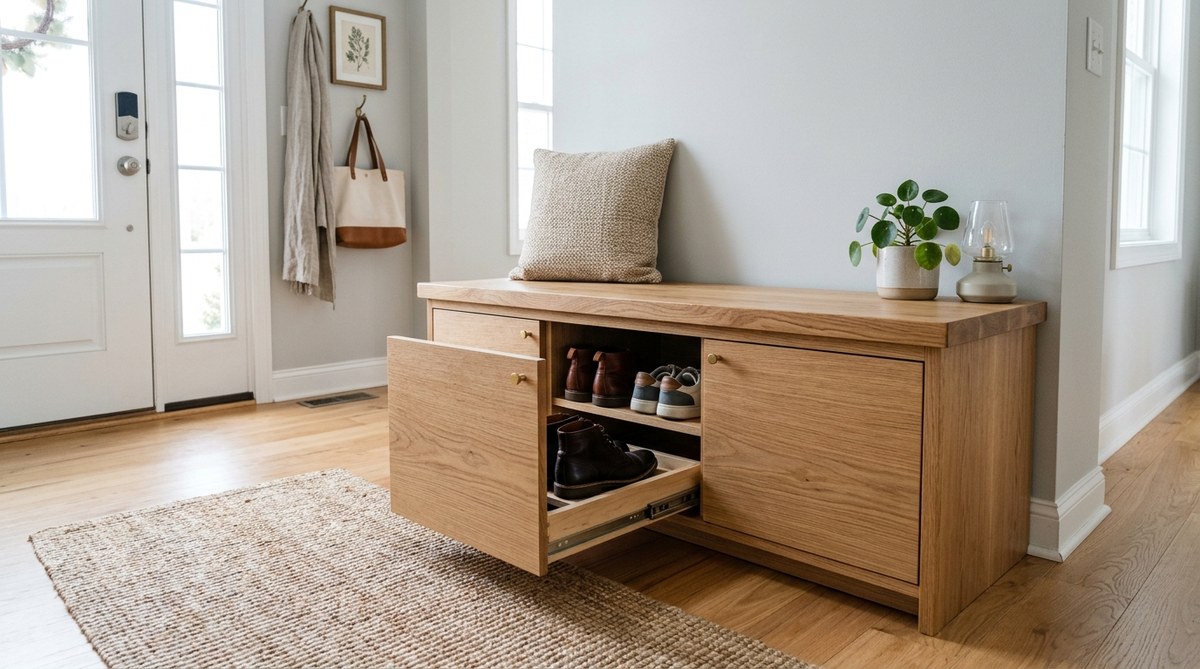
Your entryway is the first thing you see when you walk through the door. It is also where shoes, bags, and mail seem to pile up without permission. If you live in a house or apartment where every square foot matters, a bench that hides clutter can be a lifesaver. Building a DIY entryway bench with hidden shoe storage gives you a place to sit while you put on your boots and a spot to stash sneakers out of sight. The best part is that you can finish this project in two days without needing a full workshop.
This weekend project solves two problems at once: a place to sit and a place to hide shoes. You will build a sturdy bench frame from plywood and 2×4 lumber, add a flip-up or pull-out storage compartment, and finish with paint or stain. The whole build uses basic power tools and costs less than $150 in materials. Follow the cut list and step by step instructions to get a custom look that fits your wall.
What Makes a Great Entryway Bench
A bench for your mudroom or front hall needs to handle daily abuse. Wet boots, heavy bags, and kids jumping on it. That means you need solid construction. The hidden storage should be easy to access so you actually use it. If the lid is too heavy or the drawer sticks, you will just leave shoes on the floor.
Here are the features that matter most:
- Sturdy frame. Use 3/4 inch plywood for the carcass and 2x4s for the base. This keeps the bench from wobbling.
- Hidden compartment. A hinged top that lifts up gives you access to a deep bin. This is the simplest method for shoe storage.
- Ventilation. Drill small holes or leave a gap at the back so shoes can air out. Nobody wants musty sneakers.
- Bench height. Aim for 18 to 20 inches tall. That matches standard chair height and makes sitting comfortable.
- Trim and molding. Adding baseboard trim along the bottom makes the bench look like a built in. It hides the gap between the bench and the floor.
If you want to see other ways to organize your home, check out our guide on easy DIY storage solutions for small spaces.
Materials and Tools You Will Need
Before you start cutting wood, gather everything you need. This list assumes a bench that is 48 inches wide, 18 inches deep, and 20 inches tall. Adjust the dimensions to fit your wall.
Lumber and Sheet Goods
| Item | Quantity | Notes |
|---|---|---|
| 3/4 inch plywood (sandeplywood or birch) | 1 full sheet (4×8) | Use for sides, top, and bottom. |
| 2×4 lumber | 2 pieces (8 feet long) | For the base frame. |
| 1×4 pine board | 2 pieces (8 feet long) | For face frame and trim. |
| 1×2 pine board | 1 piece (8 feet long) | For ledger strips inside. |
| Wood glue | 1 bottle | Titebond II works well. |
| 1 1/4 inch pocket hole screws | 1 box | For joining plywood. |
| 2 1/2 inch construction screws | 1 box | For attaching the base. |
Hardware
- Two heavy duty lid stay hinges (gas struts work too).
- One magnetic cabinet catch.
- Wood filler.
- 120 grit and 220 grit sandpaper.
- Paint or stain of your choice.
- Polyurethane clear coat for durability.
Tools
- Circular saw or table saw.
- Drill and driver.
- Pocket hole jig (Kreg jig is standard).
- Tape measure and square.
- Clamps.
- Sander.
If you are new to woodworking or need to refresh your skills, read our post on top 10 essential tools for successful DIY home projects.
Step by Step Build
1. Cut the Plywood Panels
Start by cutting the 3/4 inch plywood sheet into these pieces:
- Two sides: 18 inches wide by 20 inches tall.
- Top panel: 48 inches wide by 18 inches deep.
- Bottom panel: 46 1/2 inches wide by 18 inches deep.
- Back panel: 48 inches wide by 18 inches tall (use 1/4 inch plywood if you want to save weight).
Use a circular saw with a straight edge guide for clean cuts. Sand all edges with 120 grit paper before assembly.
2. Build the Box
Attach the sides to the bottom panel using pocket holes and glue. The bottom sits between the two side pieces. Use clamps to hold everything square. Then attach the back panel. This stiffens the whole box.
Check for square by measuring diagonally from corner to corner. If both measurements match, you are square. Let the glue dry for one hour.
3. Build the Base Frame
Cut two 2x4s to 45 inches long. Cut two more 2x4s to 15 inches long. Arrange them into a rectangle that is 45 inches by 18 inches. Use construction screws to join the corners. This frame will sit under the plywood box and lift it off the floor.
Attach the base frame to the bottom of the plywood box using 2 1/2 inch screws from inside the box. Space the screws every 8 inches.
4. Add the Face Frame
Cut the 1×4 pine to make a front frame. You need one piece at 48 inches long and two pieces at 17 inches long (for the sides). Attach them to the front edges of the plywood box using pocket holes and glue. The face frame hides the plywood edges and gives the bench a furniture look.
5. Install Ledger Strips for the Top
Cut two 1×2 strips to 17 inches long. Screw them to the inside of the side panels, 1 inch down from the top edge. These strips support the top panel when it is closed. The top will rest on these strips and hinge at the back.
6. Hinge the Top
Lay the top panel on the bench. Open the lid stay hinges and screw them to the top panel first, then to the back edge of the bench. Test the movement. The top should lift easily and stay open. Install the magnetic catch on the front edge so the top snaps shut.
7. Finishing
Fill all screw holes with wood filler. Sand everything with 220 grit paper. Wipe off dust with a damp cloth. Apply two coats of primer and two coats of paint or stain. Use a polyurethane top coat on the seat area because it gets the most wear.
Common Mistakes and How to Avoid Them
This table shows the typical errors people make and the fix for each one.
| Mistake | Why It Happens | How to Fix It |
|---|---|---|
| Wobbly bench | Screws not driven into studs or base frame too narrow | Add corner brackets or a 2×4 center support |
| Lid slams shut | Hinges are too light or gas struts are missing | Install lid stay hinges rated for the panel weight |
| Shoes smell musty | No ventilation in the compartment | Drill 1 inch holes in the back panel or sides |
| Paint chips on the seat | No protective top coat | Sand and apply two coats of polyurethane |
| Face frame gaps | Pocket holes not aligned or glue not clamped | Use a square during assembly and clamp tight |
Expert advice: Always pre drill your screw holes when working near the edge of plywood. Plywood splits easily if you drive screws too close to the edge. A 1/8 inch pilot bit solves this problem.
Customizing Your Bench for Different Spaces
Not every entryway is the same. You may have a narrow hall or a corner that needs a different layout. Here are three variations you can make with the same basic design.
Narrow Hall Bench
If your hallway is only 30 inches wide, reduce the width of the bench to 28 inches. Keep the depth at 16 inches so people can still walk past. Use the same cut list but adjust the top and bottom panel widths.
Corner Entry Bench
Build two benches that are 24 inches wide each. Place them at a 90 degree angle in the corner. Connect them with a corner bracket. This gives you seating on two sides and storage in both compartments.
Bench with Drawers
Instead of a flip top, install a drawer slide kit and build a plywood drawer box. The drawer pulls out for access. This works better for people who have mobility issues or want to store shoes inside bins.
For more inspiration on furniture builds, take a look at how to build a custom bookshelf without professional help.
Finishing Touches That Make It Look Built In
A few details separate a homemade bench from a professional installation.
- Base shoe molding. Add a 1×2 strip along the bottom front of the bench. This covers the gap between the bench and the floor.
- Crown molding at the top. If your bench sits against a wall, add a small piece of crown molding where the top meets the wall. It hides any uneven gaps.
- Magnetic catch. Install a push to open magnetic catch so the lid stays closed without a handle. This keeps the front clean.
- Cushion. Make a simple cushion from 2 inch foam and upholstery fabric. Wrap the foam and staple it to a thin plywood base that sits on top of the bench.
Maintenance and Care
Your bench will last for years if you treat it right.
- Wipe the seat with a damp cloth once a week.
- Vacuum the inside compartment every month to remove dirt and pebbles.
- Tighten screws every six months. Wood expands and contracts with the seasons.
- Reapply polyurethane every two years if the seat starts looking dull.
Your Weekend Project Starts Now
Building a DIY entryway bench with hidden shoe storage is one of those projects that pays off every single day. You walk in the door, sit down, take off your shoes, and push them out of sight. The clutter disappears. The entryway feels bigger. And you get the satisfaction of saying you built it yourself.
Gather your materials on a Friday night. Cut and assemble on Saturday. Paint and install on Sunday. By Monday morning, you will have a functional piece of furniture that looks like it was part of the house all along.
If you want to tackle another weekend project after this one, try our guide on 7 DIY weekend projects that will instantly boost your home’s value.