
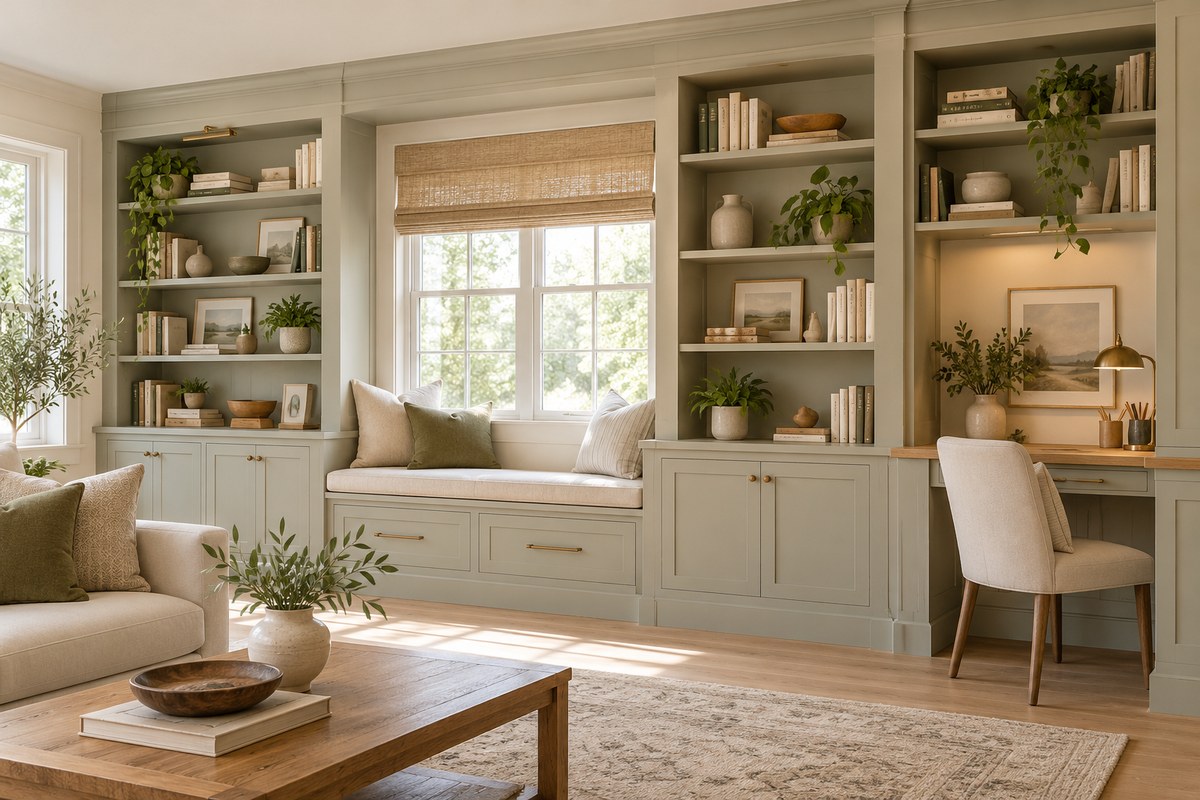
You see a photo of a stunning floor-to-ceiling library wall, and your first thought is that it must have cost a fortune. Then you notice the familiar lines of an IKEA Billy bookcase, and everything clicks. That look is totally achievable. Turning flat-pack furniture into custom built-ins is one of the smartest ways to get high-end storage without the high-end price tag. And you do not need to be a master woodworker to pull it off.
The secret to a convincing IKEA built-in hack is all in the finishing touches. Adding crown molding, a custom face frame, or a solid wood countertop transforms a row of cabinets into a piece that looks original to the room. With the right tools and a weekend of work, you can save thousands of dollars compared to custom cabinetry.
Why IKEA Furniture Works So Well for Built-Ins
IKEA cabinets and shelving units share one important trait with custom built-ins: they are modular. You can stack them side by side, screw them together, and attach them directly to the wall. Their simple, boxy shapes are a blank canvas. A coat of paint, some trim, and a few hardware swaps are all it takes to make them look like they were installed by a professional millworker.
Another advantage is the wide range of sizes. You can fill an odd alcove or a long wall without needing to cut down expensive lumber. And if you mess up a piece, replacing a single cabinet door is much cheaper than rebuilding a whole section of joinery.
The 7 Best IKEA Built-In Hacks to Try This Year
These seven projects range from beginner-friendly to moderately advanced. Each one uses a specific IKEA product as its base, then adds simple modifications to create a custom look.
1. The Billy Bookcase Library Wall
This is the classic IKEA built-in hack. A row of Billy bookcases becomes a floor-to-ceiling library wall with just a few additions.
What you need:
– Two or more Billy bookcases (the 15-inch depth version works best)
– A sheet of 1/4-inch plywood for the back panel
– Pre-primed crown molding and baseboard
– Wood filler and caulk
– Paint matched to the bookcase color
How to do it:
1. Assemble the bookcases but leave off the back panels. Cut your plywood sheet to replace the thin cardboard backing. This gives the unit more rigidity.
2. Screw the bookcases together through the side panels. Use 1-inch screws and countersink them slightly.
3. Attach the whole unit to the wall studs. This step is non-negotiable for safety.
4. Cut crown molding to fit along the top of the bookcases. Miter the corners for a seamless look.
5. Add baseboard along the bottom to cover the gap between the unit and the floor.
6. Fill all screw holes and seams with wood filler. Sand smooth, then caulk the gaps where the unit meets the wall.
7. Paint the molding, baseboard, and any exposed edges to match the bookcases.
“The biggest mistake people make is skipping the caulk and paint step. Those tiny gaps are what scream ‘IKEA.’ A little caulk and a coat of paint make all the difference.” – Ana White, DIY furniture blogger
2. The IKEA Pax Wardrobe as a Closet System
Pax wardrobes are already a great closet solution, but they look even better when you frame them in. This hack turns a standard reach-in closet into a custom dressing room.
What you need:
– IKEA Pax frames and doors
– 1×3 pine boards for the face frame
– A Kreg Jig for pocket holes
– Wood glue and clamps
How to do it:
1. Install the Pax frames according to the instructions, making sure they are level and plumb.
2. Build a simple face frame from 1×3 pine boards. Cut the top and side pieces to fit around the wardrobe frames.
3. Attach the face frame directly to the Pax frames using pocket holes and wood glue.
4. Fill the pocket holes and sand everything smooth.
5. Prime and paint the face frame to match your wall color. This makes the wardrobe look like it was built into the wall.
6. Install the Pax doors and add your choice of hardware.
For a more detailed breakdown of maximizing storage inside this system, check out our guide on how to organize your closet for maximum space and accessibility.
3. The IKEA Besta Media Console with a Butcher Block Top
A Besta cabinet is a solid base for a media wall. Adding a thick wood countertop gives it the weight of a custom piece.
What you need:
– Two Besta frames
– An IKEA Karlby butcher block countertop (or a similar piece from a home center)
– L-brackets for mounting
– Stain or polyurethane finish
How to do it:
1. Assemble the Besta frames and connect them side by side.
2. Cut the butcher block to size if needed. Sand and apply your chosen finish.
3. Place the countertop on top of the cabinets. Secure it from underneath using L-brackets screwed into the Besta frames.
4. Run the countertop all the way to the wall on each side. Caulk the back edge for a seamless look.
5. Add baseboard or a thin piece of trim at the bottom to hide the gap under the cabinets.
4. The IKEA Kallax Built-In Window Seat
Kallax shelves are perfect for creating a window seat with hidden storage. The square cubbies can hold baskets or bins for toys, blankets, or shoes.
What you need:
– Two Kallax 4×2 units
– A piece of 3/4-inch plywood for the seat top
– Foam padding and fabric for a cushion
– Trim pieces for the front
How to do it:
1. Assemble the Kallax units and place them side by side under the window.
2. Cut a plywood top that overhangs the front by about 2 inches.
3. Attach the plywood top to the Kallax units using screws from underneath.
4. Add a trim piece to the front edge of the plywood to hide the raw edge.
5. Build a simple box cushion or buy a ready-made bench cushion to fit the top.
6. Paint or stain the entire unit to match your room.
5. The IKEA Sektion Kitchen Cabinet Built-In Pantry
Sektion cabinets are the same ones used in IKEA kitchens. You can use them to build a custom pantry that looks like it came with the house.
What you need:
– Sektion base and wall cabinets
– IKEA cover panels and filler strips
– A countertop or butcher block for the top surface
– Trim and molding
How to do it:
1. Plan your layout. Use a combination of base cabinets for the lower section and wall cabinets for the upper section.
2. Install the base cabinets first. Level them carefully.
3. Add the countertop.
4. Install the wall cabinets above, leaving enough space for the countertop.
5. Use filler strips and cover panels to fill any gaps between the cabinets and the walls.
6. Add crown molding at the top and baseboard at the bottom.
7. Install doors and drawer fronts.
This is a larger project, but the result is a pantry that rivals anything from a custom cabinet shop. If you are new to this level of work, you might want to start with our list of top 10 essential tools for successful DIY home projects.
6. The IKEA Malm Dresser into a Built-In Vanity
A Malm dresser is the right height for a bathroom vanity. With a few modifications, it becomes a custom-looking sink base.
What you need:
– A Malm 6-drawer dresser
– A vessel sink or a drop-in sink
– A countertop with a cutout for the sink
– Plumbing supplies
How to do it:
1. Remove the top two drawers from the dresser. These will be replaced by the sink area.
2. Cut a hole in the back of the dresser for the plumbing.
3. Install a countertop on top of the dresser. You can use a piece of butcher block or a prefabricated vanity top.
4. Cut a hole in the countertop for your sink.
5. Run the plumbing through the back of the dresser and connect the sink.
6. Seal all exposed wood edges with polyurethane to protect against moisture.
7. Add a backsplash to cover the gap between the countertop and the wall.
7. The IKEA Tarva Dresser with Shaker-Style Doors
The Tarva dresser is made from solid pine, which means it takes paint and stain beautifully. This hack turns a simple dresser into a classic Shaker-style piece.
What you need:
– An IKEA Tarva dresser
– 1/4-inch plywood for door panels
– 1×2 pine boards for door frames
– Wood glue and brad nails
How to do it:
1. Assemble the dresser but do not attach the drawer fronts yet.
2. Build new drawer fronts using the 1×2 pine boards as a frame and the plywood as the center panel.
3. Cut the 1×2 boards to create a rectangle that fits over the existing drawer front.
4. Glue and nail the plywood panel into the back of the frame.
5. Attach the new drawer fronts to the existing drawers using screws from the inside.
6. Fill all nail holes and sand the entire dresser.
7. Paint the dresser in your chosen color. A matte finish works well for a Shaker look.
8. Add brass or nickel cup pulls for a classic touch.
Common Mistakes to Avoid with IKEA Built-Ins
Even the best hacks can look off if you skip the details. Here is a table of common mistakes and how to avoid them.
| Mistake | Why It Happens | The Fix |
|---|---|---|
| Gaps between units and walls | Not measuring the alcove or wall space before assembly | Use filler strips or scribe trim to fill gaps |
| Visible screw heads | Not countersinking or using wood filler | Countersink all screws and fill with wood putty |
| Uneven tops on side-by-side units | Not checking for level before connecting | Shim the feet of each unit until everything is level |
| No crown molding | Thinking the flat top looks fine on its own | Add crown molding to create a finished, built-in look |
| Wrong paint sheen | Using a glossy paint that shows every imperfection | Use a matte or eggshell finish that hides flaws |
| Skipping the caulk | Leaving gaps between the unit and the wall | Caulk all seams where the unit meets the wall or ceiling |
Tools You Will Need for Most Projects
You do not need a full workshop, but a few specific tools will make these hacks much easier.
- A miter saw for cutting trim and molding
- A drill/driver for assembly and mounting
- A Kreg Jig for pocket holes (optional but helpful)
- A caulk gun for filling gaps
- A random orbital sander for smoothing wood filler
- A level (a 4-foot level is best for long runs)
- A stud finder for securing units to the wall
If you are just starting out, you can find a more complete list of essentials in our guide on master basic home repairs to save money and increase safety.
How to Choose the Right IKEA Product for Your Hack
Not all IKEA furniture is created equal for built-in projects. Here is a breakdown of the best products to use.
Best for bookshelves and libraries:
– Billy (15-inch depth)
– Kallax (for a more modern look)
Best for closets and wardrobes:
– Pax (adjustable and deep)
– Elvarli (open shelving system)
Best for media centers and cabinets:
– Besta (low profile, great for TVs)
– Sektion (full kitchen cabinets)
Best for dressers and vanities:
– Malm (right height for a vanity)
– Tarva (solid wood, easy to modify)
Best for entryways and mudrooms:
– Ivar (customizable, can be painted)
– Hemnes (sturdy and classic)
A Simple Step-by-Step Process for Any IKEA Built-In
If you want a universal method that works for most projects, follow these six steps.
- Measure your space carefully. Measure the width, height, and depth of the alcove or wall. Write down the measurements and double-check them.
- Choose your IKEA units. Select products that fit within your measurements. Leave a 1/2-inch gap on each side for filler strips.
- Assemble and connect the units. Follow the IKEA instructions, but skip the back panel if you plan to replace it with plywood. Screw the units together through the side panels.
- Attach the units to the wall. Use screws into wall studs. This step is critical for safety, especially with tall bookcases or wardrobes.
- Add trim and molding. Install crown molding at the top, baseboard at the bottom, and filler strips on the sides. Miter the corners for a professional finish.
- Fill, caulk, and paint. Fill all screw holes and seams with wood filler. Caulk the gaps between the unit and the wall. Then paint everything to match.
Making Your Built-In Look Like It Was Always There
The final step is the most important. A built-in hack only looks good if it blends into the room. Here are the finishing touches that make all the difference.
- Paint the unit the same color as the wall. This makes the built-in disappear into the architecture.
- Use the same baseboard and crown molding as the rest of the room. This ties the built-in to the existing trim.
- Add lighting. Puck lights or LED strips inside the shelves create a high-end display effect.
- Choose hardware that matches the style of your home. Brushed nickel, brass, or matte black knobs and pulls add a custom touch.
For more inspiration on decorating the space around your new built-in, take a look at our ideas for transform your living space with simple DIY home decor projects.
Your Weekend Project Starts Now
IKEA built-in hacks are the perfect middle ground between budget furniture and custom cabinetry. You get the storage you need at a fraction of the cost, and you get the satisfaction of building something with your own hands. Pick one project from this list, gather your materials, and give yourself a weekend to complete it. The result will be a piece of furniture that looks like it was designed for your home. And when your friends ask where you bought it, you can smile and say you built it yourself.