
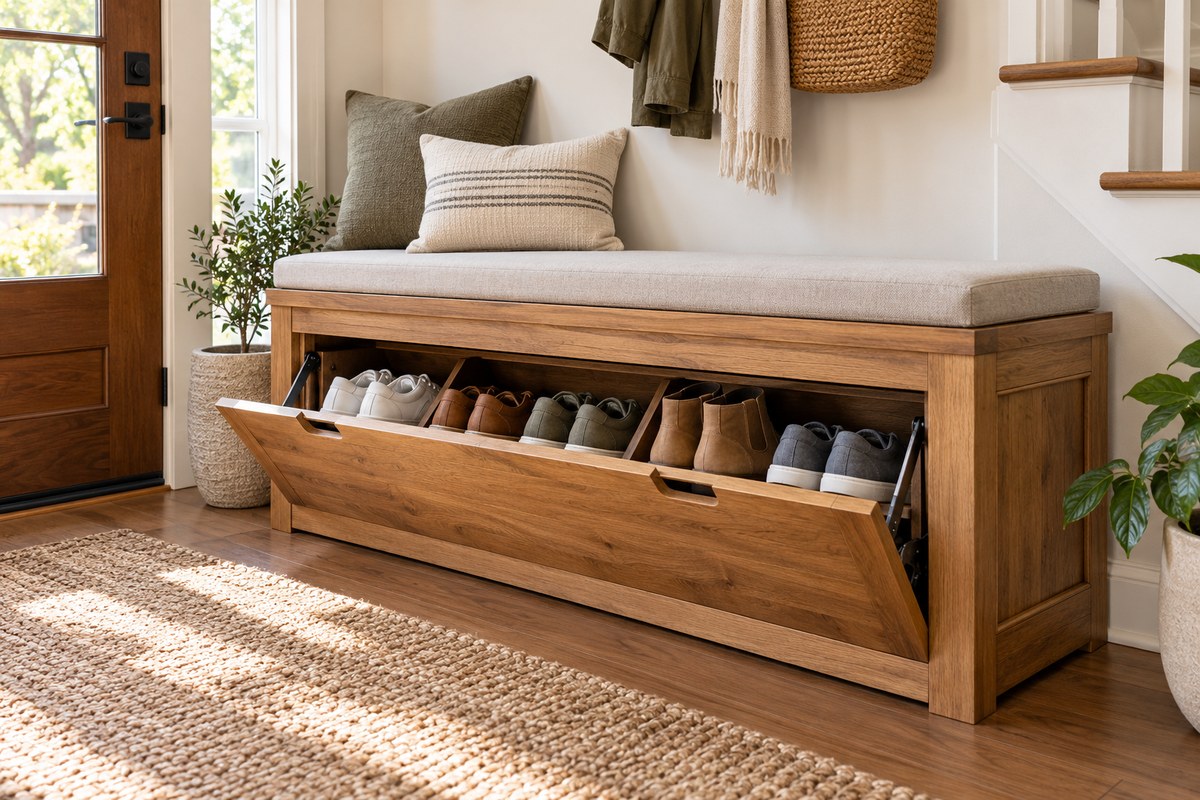
Your entryway is the first thing you see when you walk in the door. It is also the place where shoes, bags, and mail pile up into a chaotic mess. A custom bench with hidden shoe storage solves both problems at once. You get a comfortable spot to sit while you pull off your boots, and all those sneakers disappear behind closed doors. The best part is that you can build this yourself in a weekend with standard tools and materials from the home center. You do not need a full workshop or years of experience. Just a solid plan and a Saturday to make it happen.
Building a DIY entryway bench with shoe storage is a weekend project that adds serious function to your home. You will learn how to build a sturdy frame, add a hidden compartment for shoes, and attach a comfortable seat. The project uses basic plywood and 2x4s, costs under $150, and requires only a circular saw, drill, and pocket hole jig. With the plans and steps here, you can finish in two days and enjoy a clutter free entryway for years.
Why a Hidden Shoe Bench Changes Your Morning Routine
Think about the last five mornings. You probably tripped over a pair of sneakers while carrying coffee. You might have kicked aside rain boots to reach the door. An open shoe rack helps a little, but it still looks messy. A bench with closed storage hides the clutter and gives you a place to sit. That simple change makes a huge difference when you are rushing out the door.
A custom build also lets you match the dimensions to your space. Store bought benches are either too short, too shallow, or they waste space. When you build your own, you can make it fit your hallway exactly. You can also choose the wood and finish that matches your trim and furniture.
Tools and Materials You Will Need
Before you start cutting wood, gather everything. Running to the hardware store mid project ruins your weekend momentum.
Tools list:
- Circular saw or miter saw (a circular saw works fine with a straight edge guide)
- Drill and drill bits
- Pocket hole jig (Kreg K5 or similar)
- Tape measure and square
- Clamps (at least two bar clamps)
- Sander or sanding block
- Level
Materials for a 48 inch wide bench:
- 3/4 inch sanded plywood (one full sheet, 4×8 feet)
- Two 2x4x8 boards for the frame
- 1 1/4 inch pocket hole screws
- 2 1/2 inch construction screws
- Wood glue
- Paint or stain and a clear topcoat
- Two sets of cabinet hinges (soft close is nice)
- Two magnetic cabinet catches
- 1×4 board for the front trim (6 feet)
Optional but helpful:
- Kreg face frame clamp
- Brad nailer and compressor
- Foam cushion and upholstery fabric for the seat
Step by Step Build Process
The bench is built in three main sections: the base frame, the shoe storage box, and the hinged seat. You can complete each section in a few hours.
1. Cut the Plywood Panels
Start by breaking down the plywood sheet. You need these pieces:
- Top panel: 48 x 18 inches (this becomes the seat)
- Bottom panel: 48 x 18 inches
- Two side panels: 18 x 16 inches
- Back panel: 48 x 16 inches
- Divider: 16 x 16 inches (this goes in the middle to split the shoe compartment)
Cut everything with a circular saw and a clamped straight edge. Sand the edges smooth with 120 grit paper.
2. Build the Frame
The frame supports the weight of people sitting on the bench. Use the 2x4s for this.
Cut four legs at 17 inches each. Cut two front rails and two back rails at 45 inches each. Assemble the frame using pocket holes and wood glue. Attach the legs at each corner and add the rails between them. Make sure the frame is square by measuring diagonally. Both diagonals should be equal.
3. Attach the Plywood Box
Lay the frame on its back. Attach the bottom panel to the frame with 1 1/4 inch screws. Then attach the back panel. The back panel sits flush with the back of the frame. Next, attach the side panels. Finally, install the divider in the center. This creates two separate shoe compartments.
Expert tip: Drill pilot holes for every screw near the edges of plywood. Plywood splits easily if you drive screws too close to the edge. A pilot hole prevents cracks and keeps your bench looking clean.
4. Build the Hinged Seat
The seat is a single piece of plywood with a front trim piece. Attach the 1×4 trim to the front edge of the top panel. Use glue and brad nails. This gives the seat a thicker, more finished look.
Flip the seat over and attach the cabinet hinges to the back edge. Position the hinges so they line up with the back rail of the frame. Screw the hinges to the frame. Test the opening and closing motion. The seat should lift smoothly and stay open without falling back.
Install the magnetic catches on the front edge of the box and on the underside of the seat. These keep the seat closed when you are not using it.
5. Sand and Finish
Disassemble the hinges if you want to finish the pieces separately. Sand everything with 120 grit, then 220 grit. Wipe off dust with a tack cloth.
Paint or stain the bench. A satin paint finish hides fingerprints well. If you use stain, apply a polyurethane topcoat for durability. Let the finish cure for 24 hours before reassembling.
Common Mistakes and How to Avoid Them
| Mistake | Why It Happens | How to Fix It |
|---|---|---|
| Seat is too heavy | Using thick plywood for the whole seat | Use 3/4 inch plywood with a 1×4 trim; do not double up layers |
| Shoes do not fit | Compartment is too shallow | Make the box at least 16 inches deep; measure your largest boots first |
| Bench wobbles | Frame is not square | Check diagonals before attaching panels; shim the bottom if needed |
| Hinges bind | Screws are too long | Use screws that are exactly the hinge manufacturer’s recommended length |
| Paint peels | Skipping primer on plywood | Always prime raw plywood edges; they absorb paint unevenly |
Finishing Touches That Make It Look Built In
A bench that looks like it came with the house is the goal. Here are a few ways to get that custom feel.
- Add baseboard returns. Cut small pieces of baseboard to fit on the sides of the bench. This makes it look like the bench was built into the wall.
- Use the same paint color. Match the bench to your existing trim color. White, gray, or navy are popular choices in 2026.
- Add a cushion. A 2 inch thick foam pad wrapped in fabric makes the seat comfortable. Use outdoor fabric for durability.
- Install a hook rail above. A simple strip of wood with hooks above the bench gives you a place for coats and bags. This turns a single bench into a full mudroom station.
If you want more ideas for organizing your space, check out these simple steps to organize and maximize space in your living room. The same principles apply to entryways.
How to Organize the Shoe Storage
The hidden compartment works best when you use it smartly. Here are a few tips to keep the inside organized.
- Store off season shoes in bins at the bottom.
- Keep daily shoes on the floor of the compartment.
- Use a small tension rod to hang flip flops or sandals.
- Add a thin shelf for kids shoes if the compartment is tall enough.
A well organized shoe storage area means you never have to dig through a pile to find the matching sneaker again.
Weekend Timeline
Here is a realistic schedule for a Saturday and Sunday build.
Saturday morning (4 hours): Cut all plywood and 2×4 pieces. Sand everything. Build the frame.
Saturday afternoon (3 hours): Assemble the plywood box. Attach the frame and box together. Install the divider.
Sunday morning (3 hours): Build the hinged seat. Install hinges and magnetic catches. Test the fit.
Sunday afternoon (2 hours): Sand again. Apply primer and first coat of paint.
Sunday evening (1 hour): Apply second coat of paint. Let dry overnight.
You can sit on the bench Monday morning. Let the paint cure fully before storing shoes inside.
Customize the Size for Your Space
The plans above work for a 48 inch wide bench. You can adjust the width easily. Just change the length of the top, bottom, and back panels. Keep the depth at 18 inches so the seat is comfortable. If your entryway is narrow, reduce the depth to 16 inches. If you have a wide mudroom, go up to 60 inches wide and add a second divider.
For a smaller space, you might also like these easy DIY storage solutions for small spaces. They pair well with a compact bench.
Why This Project Works for Intermediate Builders
This bench uses pocket hole joinery, which is forgiving for anyone who has built a few projects before. You do not need dovetails or mortise and tenon joints. The plywood panels hide the frame, so small gaps in the 2×4 frame do not matter. The hinged seat is straightforward if you take time to align the hinges.
If you are newer to woodworking, practice on scrap wood first. Cut a few pocket holes and join two pieces together. Once you feel comfortable, move to the real materials.
A Bench That Grows with Your Family
One of the best things about this build is that you can modify it later. If your kids grow and need more shoe space, add a second compartment by building a matching unit next to it. If you want a longer bench, build two boxes side by side and attach a single long seat on top.
You can also swap the hinges for gas struts. That makes the seat lift with one finger. It is a small upgrade that feels luxurious.
Your Entryway Deserves This Upgrade
A pile of shoes by the door is a daily annoyance that you can fix in one weekend. This DIY entryway bench with shoe storage gives you a clean look, a place to sit, and a hidden spot for all those sneakers and boots. The materials are affordable, the steps are clear, and the result is something you will use every single day.
Gather your tools, pick up the plywood, and start cutting. By Sunday night you will have a bench that makes your entryway feel twice as organized. Your mornings will thank you.