
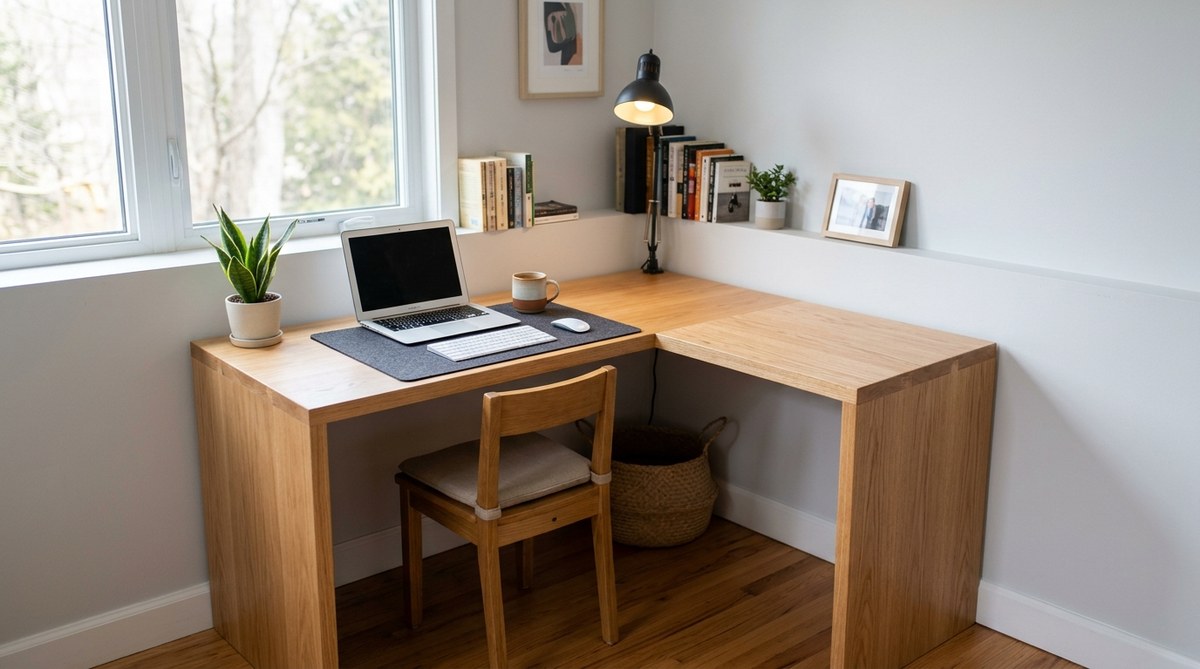
A dead corner in your home office or bedroom can become your favorite workspace. You do not need a truckload of lumber or a full workshop to make it happen. With a single sheet of plywood and two precise saw cuts, you can build a corner desk that fits your space perfectly. It sounds too good to be true, but this project relies on geometry instead of guesswork. The trick is cutting a square panel diagonally to create two matching triangles. One triangle becomes the desk top. The other triangle becomes a support shelf underneath. No complex joinery. No expensive hardware. Just a clean, modern desk that maximizes every inch of your corner.
These DIY corner desk plans prove that less is more. You only need a 4×4 foot sheet of plywood, a circular saw or jigsaw, and a straightedge. After two diagonal cuts, you assemble the two triangular pieces into a sturdy L-shaped desk. The result is a custom workstation that costs under $50 and takes one afternoon to build. No advanced skills required.
Why This Desk Works for Small Spaces
Standard rectangular desks waste space in a corner. The back edges push against the wall, but the front corners jut out into the room. A triangular desk top solves that problem. It fits snugly into the corner, leaving the rest of the floor open for other furniture.
This design also gives you a built-in shelf. The second triangle sits below the desktop on wooden cleats. You can use it to hold your printer, a stack of books, or a small plant. Because both pieces come from the same sheet of plywood, the grain matches perfectly. It looks like a custom piece from a furniture store, but you built it yourself.
If you are looking for other ways to improve your home on a budget, check out these 5 budget-friendly DIY projects to upgrade your home this season. They follow the same straightforward approach.
Materials and Tools You Will Need
Before you make any cuts, gather these items. The list is short, and most of these tools are already in your garage.
Materials
- One sheet of 3/4 inch plywood (4 feet by 4 feet). Birch or sandeply works well.
- Wood glue.
- 1 1/4 inch wood screws.
- Two 2×2 boards (8 feet long each) for the wall cleats.
- Sandpaper (80 grit and 120 grit).
- Paint or polyurethane finish (optional).
Tools
- Circular saw or jigsaw.
- Tape measure.
- Speed square or framing square.
- Clamps.
- Drill and driver bits.
- Level.
- Stud finder.
If you are new to woodworking, you might want to read up on the top 10 essential tools for successful DIY home projects before you start. Having the right gear makes every job easier.
Step by Step: The Two-Cut Method
Follow these steps carefully. The whole process takes about three hours, including drying time for the glue.
1. Measure Your Corner
Not all corners are perfectly square. Use a speed square to check the angle. If your walls meet at 90 degrees, you are set. If the angle is off by a degree or two, do not worry. You will scribe the final fit later.
2. Make the First Cut
Place the 4×4 plywood sheet on a flat surface. Measure from one corner along both edges to find the center of the sheet. Mark this point. Now draw a line from one corner to the opposite corner. This is your first cut line.
Set your circular saw to the correct depth. Clamp a straightedge along the line. Cut slowly and steadily. You now have two identical right triangles.
3. Make the Second Cut (The Notch)
This is the clever part. Take one of the triangles. Measure 12 inches from the pointed tip along the long edge. Mark this spot. Draw a line perpendicular to the long edge. Cut along this line to remove the tip. This creates a flat edge that will sit flush against the wall.
4. Attach the Wall Cleats
Cut your 2×2 boards into two pieces. Each piece should be 2 inches shorter than the wall side of your desktop triangle. Use a stud finder to locate the wall studs in your corner. Screw the cleats into the studs at the height you want your desk. Use a level to make sure they are straight.
Expert advice: Screw the cleats into at least two studs on each wall. If you hit only drywall, use toggle bolts rated for at least 50 pounds. A desk loaded with a monitor and books can get heavy fast.
5. Install the Desktop
Place the desktop triangle onto the cleats. The flat notched edge should sit against the wall. The two straight edges rest on the cleats. Screw through the desktop into the cleats from underneath. Use three screws per cleat.
6. Add the Lower Shelf
Take the second triangle. Measure and mark a point 6 inches from the tip along the long edge. Cut off the tip at a 90 degree angle. This smaller triangle becomes your shelf.
Install a second set of cleats on the wall about 10 inches below the desktop. Place the shelf triangle on these cleats and screw it in place.
Common Mistakes and How to Avoid Them
Even simple projects can go wrong. Here is a table that outlines the most common errors and the simple fixes.
| Mistake | Why It Happens | How to Fix It |
|---|---|---|
| Desktop wobbles | Cleats are not level or not attached to studs | Recheck with a level. Add shims behind the cleats if needed. |
| Gap between desk and wall | Corner is not a perfect 90 degrees | Trace the wall profile onto the desktop and trim with a jigsaw. |
| Plywood splinters at the cut | Saw blade is dull or you cut too fast | Use a fine-tooth blade. Apply painter’s tape along the cut line. |
| Screws strip out | Pilot hole is too small or too large | Use a countersink bit that matches your screw size. |
| Shelf bows under weight | Plywood is too thin or span is too long | Add a center support leg made from a 2×2. |
Finishing Your Desk
Once the desk is assembled, give it a good sanding. Start with 80 grit to smooth any rough edges. Finish with 120 grit for a silky feel. Wipe away the dust with a damp cloth.
You have two finishing options. Paint gives a clean, modern look that matches any room. A clear polyurethane shows off the natural wood grain. Apply two thin coats with a foam brush. Let each coat dry for two hours, then sand lightly with 220 grit between coats.
For more inspiration on adding personality to your space, take a look at these 5 trendy DIY projects to try in 2026. A fresh coat of paint or a new desk can completely change how a room feels.
Making It Your Own
The basic design is just a starting point. Here are a few ways to customize your corner desk without adding complexity.
- Add a keyboard tray. Screw a small piece of plywood to the underside of the desktop using drawer slides.
- Install cable management. Drill a 2-inch hole near the back corner of the desktop. Feed your cables through a grommet.
- Build a monitor riser. Use scrap plywood to make a small platform that lifts your monitor by 4 inches.
- Add a second shelf. Cut the remaining plywood scraps into narrow strips and install them as floating shelves above the desk.
If you want to take your DIY skills even further, consider building a custom wall-mounted desk for your home office in one weekend. The same principles apply, but the design changes to fit a different space.
Your Weekend Project Starts Now
You do not need a massive budget or years of experience to build furniture that works for your life. This corner desk proves that two cuts and a few hours of work can transform an unused corner into a productive workspace. The materials are cheap. The process is forgiving. And the result is a desk that fits your room better than anything you could buy at a store.
Gather your plywood, clear your Saturday afternoon, and make those cuts. Your new desk is waiting in that corner.