
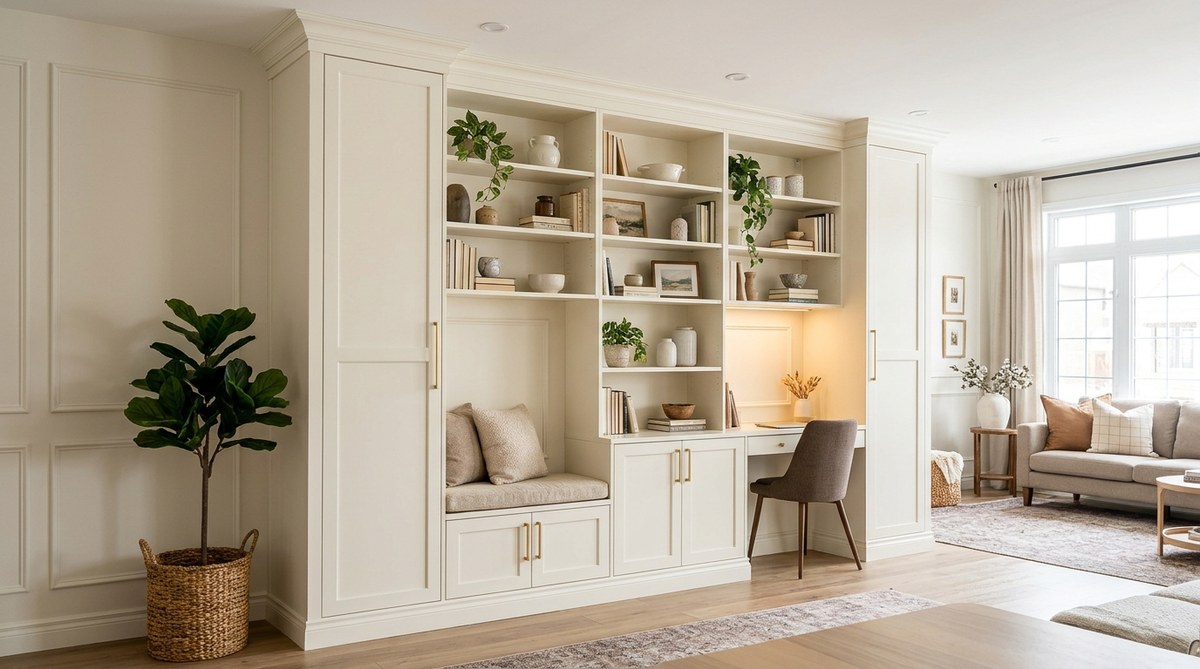
You have seen them online. A wall of floor-to-ceiling bookshelves that look like they cost five thousand dollars. A media center that fits the TV like a glove. A window seat with storage that seems to have grown out of the wall itself. Then you look closer. The doors are familiar. The cabinet frames are standard sizes. You realize it is all IKEA furniture, transformed with a little wood filler, some trim, and a lot of patience.
That transformation is exactly what this guide is for. We will walk through the core strategies that turn affordable IKEA cabinets into pieces that look like custom millwork. No contractor required. No carpentry degree needed. Just a weekend, a few tools, and the right plan.
The secret to a convincing IKEA built-in hack is not the cabinet itself but the details around it. Adding crown molding, base trim, and custom filler panels hides the gaps and creates the illusion of a single, seamless unit. Focus your time and budget on the finishing touches, and you will save thousands over real custom carpentry.
Why This Approach Works So Well
Custom built-ins are expensive. A single wall unit from a carpenter can cost between $3,000 and $10,000 depending on size and materials. An IKEA cabinet system like the SEKTION or BESTA line costs a fraction of that. The catch is that the cabinets look exactly like what they are: flat-pack boxes. To make them look built-in, you have to bridge the gap between the cabinet and the wall, the floor, and the ceiling.
The IKEA built-in hack is popular because the structural work is already done. The boxes are strong, the hardware is reliable, and the sizes are modular. Your job is to add the dressing. Think of it like buying a plain white shirt and adding a tailored jacket. The shirt does the work, but the jacket makes it look custom.
The 7 Core Strategies for a Seamless Look
There are many ways to approach this project, but every successful IKEA built-in hack relies on a combination of these seven techniques. Pick the ones that fit your space and skill level.
1. Build a Continuous Base Platform
IKEA cabinets sit on small plastic feet. Those feet are fine for a kitchen island, but they ruin the built-in illusion. Instead, build a continuous wooden base out of 2×4 lumber.
- Measure the total width of your cabinet run.
- Cut a 2×4 frame that matches that width and sits about 4 inches off the floor.
- Level the frame with shims, then screw it into the wall studs.
- Place your IKEA cabinets on top of the frame.
- Cover the front of the frame with a tall baseboard or a piece of MDF.
This raises the cabinets slightly, hides the legs, and gives you a place to attach toe-kick trim. It also makes the entire installation feel solid.
2. Add Crown Molding at the Top
Nothing screams “store-bought” like a gap between the top of the cabinet and the ceiling. Crown molding closes that gap and adds a high-end architectural detail.
- Install a cleat (a horizontal strip of wood) on the wall above the cabinets.
- Attach the crown molding to the cleat and to the top of the cabinets.
- Miter the corners for a clean finish.
You can find pre-primed crown molding at any home center. Paint it the same color as the wall or the cabinets for a seamless look.
3. Use Filler Strips to Close Gaps
IKEA cabinets are modular, but walls are not. You will almost always have a gap on one or both sides. Filler strips solve this.
- Cut a piece of 1×2 or 1×3 pine to the height of your cabinet.
- Paint or stain it to match the cabinet door color.
- Screw it into the side of the cabinet frame, flush with the front.
- Caulk the seam between the filler strip and the wall.
This trick makes the unit look like it was built specifically for that spot.
4. Replace Doors with Custom Fronts
The standard IKEA doors are fine, but you can take the hack further by swapping them out.
- Order custom door fronts from a company like Semihandmade or Kitch.
- Use plain MDF slabs and add your own shaker-style trim.
- Install flat-panel doors and add vertical battens for a modern look.
Custom doors are the most expensive part of this strategy, but they also make the biggest visual impact.
5. Create a Unified Face Frame
Most IKEA cabinets are frameless. That means the doors attach directly to the sides of the box. To get a traditional built-in look, you can add a face frame.
- Cut strips of 1×2 pine to fit around the front of each cabinet opening.
- Glue and nail them in place.
- Fill the nail holes and paint.
A face frame makes the cabinets look like traditional American furniture. It also gives you a surface to attach overlay doors.
6. Install Under-Cabinet Lighting
Real built-ins always have lighting. It makes the contents pop and adds a layer of polish.
- Use low-voltage LED tape lights.
- Run the wires through a small channel on the back of the cabinet.
- Install a dimmer switch on the side or use a remote.
You can buy plug-in kits that do not require an electrician. Just hide the cord behind the cabinet.
7. Anchor Everything to the Wall
This is not just for looks. It is for safety. A tall cabinet full of books can tip over.
- Use L-brackets to screw the top of each cabinet into the wall studs.
- Screw the cabinets together through the sides.
- Use the included anti-tip straps as a backup.
Once everything is anchored, you can caulk and paint over the brackets to hide them.
Common Mistakes and How to Avoid Them
Even experienced DIYers make these errors. Here is a table of the most common pitfalls and the simple fixes.
| Mistake | Why It Happens | How to Fix It |
|---|---|---|
| Gaps between cabinets | The floor is uneven. | Shim the base frame until everything is level. |
| Visible seams at the top | Crown molding is not thick enough. | Use a larger profile molding or add a built-up band. |
| Doors do not align | Cabinet boxes are not square. | Adjust the hinges. IKEA hinges have fine-tuning screws. |
| Paint cracks at the seams | Movement from humidity. | Use flexible caulk (paintable silicone) at all joints. |
| The unit feels wobbly | Not anchored to studs. | Add more brackets and screw into solid wood. |
“The difference between a good IKEA hack and a great one is the caulk and paint. Spend the extra hour filling every tiny gap. It makes the whole thing look like one solid piece.” — A seasoned DIY blogger on a popular home improvement forum.
The Right Tools for the Job
You do not need a full workshop, but a few specific tools make the job much easier.
- A miter saw for cutting trim and molding.
- A drill/driver with a clutch for driving screws into particleboard.
- A level that is at least 48 inches long.
- A caulk gun and a good quality paintable caulk.
- A nail gun (brad nailer) for attaching trim.
If you are just starting out, check out our guide on top 10 essential tools for successful DIY home projects. It covers everything you need to build a solid toolkit.
A Step-by-Step Process for a Simple Media Wall
Let us walk through a real example. You want a wall-to-wall media unit in your living room that is 96 inches wide and 84 inches tall.
- Plan the layout. Use the IKEA online kitchen planner (it works for BESTA and SEKTION too) to arrange your cabinets. You will likely need two 30-inch wide cabinets and one 36-inch wide cabinet to fill the space.
- Build the base frame. Cut a 2×4 frame that is 96 inches wide and 4 inches tall. Level it on the floor.
- Assemble the cabinets. Follow the instructions but leave the doors off. Place them on the base frame.
- Clamp and screw. Clamp the cabinets together and screw through the sides. Check for level again.
- Anchor to the wall. Screw L-brackets into the top of each cabinet and into the wall studs.
- Add filler strips. Cut and install filler strips on the ends to meet the walls.
- Install the crown molding. Miter the corners and nail the molding in place.
- Caulk and paint. Fill every seam, nail hole, and gap with caulk. Let it dry, then paint the entire unit the same color as the wall.
- Hang the doors. Adjust the hinges so the gaps are even.
- Add the hardware. Pulls or knobs finish the look.
This process works for any room. If you are tackling a smaller space, our article on easy DIY storage solutions for small spaces has more targeted ideas.
Finishing Touches That Make the Difference
The last 10 percent of the work creates 90 percent of the impact.
- Paint the inside of the cabinets. White interiors reflect light and look cleaner.
- Use the same color paint as the walls. This makes the unit recede visually and feel architectural.
- Add decorative trim. Small details like rosettes or plinth blocks at the corners add a custom touch.
- Install glass doors on some sections. This breaks up the mass and lets you display items.
You can also consider adding a countertop or a shelf on top of a low cabinet to create a desk area. For more ideas on that, read about how to build a custom wall-mounted desk for your home office in one weekend.
Your Weekend Project Starts Now
The idea of building custom built-ins can feel intimidating. But when you break it down into these seven strategies, it becomes a series of small, manageable tasks. You are not building furniture from scratch. You are dressing up smart, affordable boxes with trim, paint, and lighting.
The materials for a full wall unit cost around $800 to $1,500. The same look from a custom carpenter would run $5,000 or more. That is a savings of thousands of dollars for a weekend of work. And the best part is that you get to say, “I built that.”
So pick your space, grab your miter saw, and start measuring. The look you want is closer than you think. And if you need a little more inspiration, check out 7 clever ways to turn IKEA furniture into custom built-ins for more project ideas.