
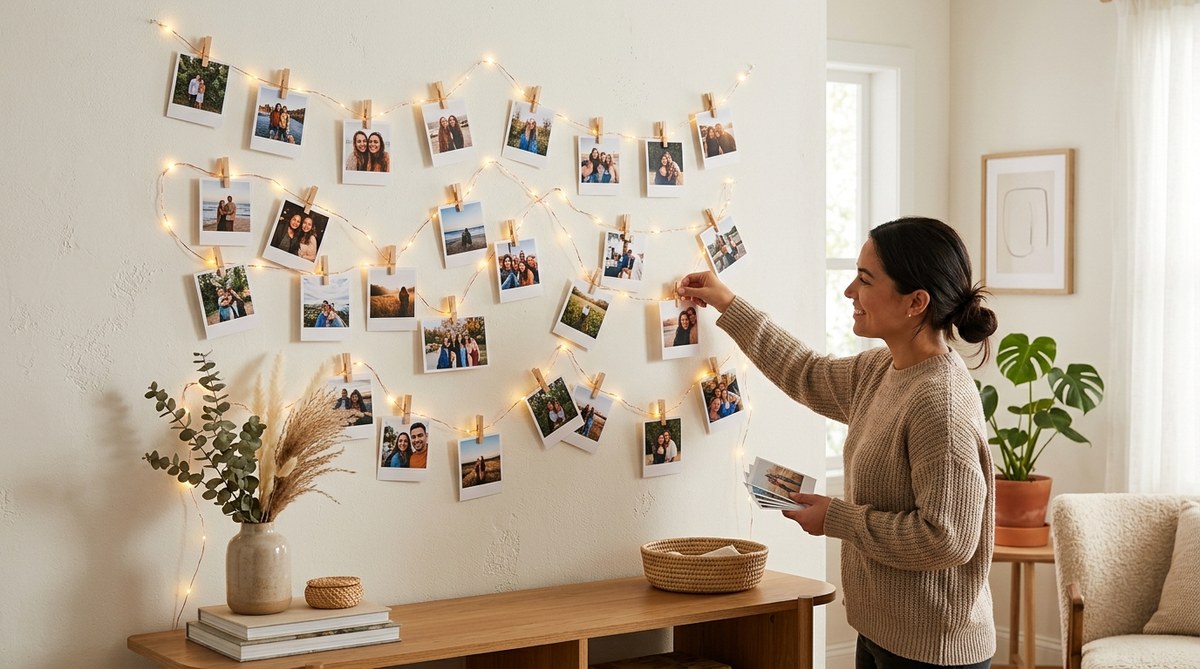
You walk into your living room and see a blank wall. It stares back at you every day. You want to fill it with memories, but you rent your apartment. You cannot paint, and you definitely cannot drill holes. A DIY photo display wall using string lights solves this problem in one evening. It costs under thirty dollars, it looks like a cozy cafe, and it leaves zero marks on the wall when you move out.
A DIY photo display wall using string lights is the best way to personalize your space without permanent damage. You need string lights, clips or clothespins, and your favorite photos. The whole project takes about 45 minutes. It works in dorm rooms, apartments, and bedrooms. You can change the photos anytime. The result is a warm, glowing gallery that makes any room feel like home.
What You Need for a Photo Display Wall with String Lights
Gather these items before you start. Most of them are probably in your home already.
- A set of string lights (LED fairy lights work best because they stay cool)
- Small clothespins or binder clips
- Printed photos (4×6 inch prints are a standard size)
- Removable adhesive hooks (Command hooks are a popular brand)
- A measuring tape or ruler
- Scissors (if your string lights need trimming)
- A level (your phone has one built in)
If you want to get creative, you can also add small postcards, ticket stubs, or dried flowers. The string lights become the backbone of your display, so choose a warm white tone for a soft glow. Avoid large bulb lights because they are heavy and can pull the photos out of alignment.
Step by Step: How to Build Your DIY Photo Display Wall
Follow these numbered steps to set up your wall in less than an hour.
-
Plan your layout. Lay the string lights on the floor in the shape you want on the wall. A zigzag pattern works well for a large area. A single horizontal line is great for above a bed or sofa. Measure the wall space first so you know how many hooks you need.
-
Attach the adhesive hooks. Place one hook at each corner of your planned shape. For a zigzag pattern, place hooks at every turn. Press firmly for 30 seconds each. Wait one hour before hanging anything on them. This gives the adhesive time to bond with the wall.
-
Hang the string lights. Drape the lights over the hooks. Let the cord hang naturally. Do not pull it tight. A slight droop looks organic and prevents stress on the hooks. Plug the lights in to check the glow before you add photos.
-
Clip your photos onto the string. Use one clothespin per photo. Pin the photo so it hangs straight down from the string. Space the photos about six inches apart. You can overlap them slightly for a layered look.
-
Adjust the balance. Step back and look at the wall. Move photos that are too close together. Tilt some photos at a slight angle for a casual feel. Turn the lights on and enjoy the result.
Expert advice: Use matte photo paper instead of glossy. Glossy prints reflect the light from the string lights and create glare. Matte paper absorbs the glow and makes the photos look soft and warm.
Choosing the Right Photos for Your String Light Wall
Not every photo works well on a string light display. Pick images that tell a story. A mix of portrait and landscape orientations adds visual variety. Black and white photos look especially good against warm string lights.
Consider these photo ideas:
- A candid shot from a road trip
- A polaroid style picture of your pet
- A group photo from a birthday dinner
- A landscape from a favorite hike
- A selfie with a friend you miss
Avoid photos with dark backgrounds or low contrast. They get lost against the string lights. Bright, clear images stand out the best.
Common Mistakes and How to Avoid Them
Even simple projects can go wrong. Here is a table of the most common issues and their solutions.
| Mistake | Why It Happens | How to Fix It |
|---|---|---|
| Photos fall off | Clothespins are too weak | Use binder clips instead |
| String lights sag too much | Hooks are spaced too far apart | Add extra hooks every 2 feet |
| Glare on photos | Glossy paper reflects light | Switch to matte prints |
| Wall gets damaged | Adhesive pulls off paint | Warm the adhesive with a hair dryer before removal |
| Photos look crooked | No level used | Use a phone level app to check alignment |
If you are renting, the hair dryer trick is a lifesaver. Heat the adhesive for 20 seconds, then peel slowly. The paint stays on the wall, and your security deposit stays in your pocket.
How This Project Compares to Other Wall Displays
String lights are not the only way to display photos without damage. But they have clear advantages over other methods.
A traditional gallery wall requires nails and a hammer. That is not an option for most renters. A cork board is renter friendly, but it covers a large area and does not add light. A digital photo frame is easy, but it costs more and does not have the same cozy feel.
String lights combine decoration with lighting. They act as both the frame and the ambiance. You can change the photos every season without buying new hardware. This makes them a flexible choice for anyone who likes to update their decor often.
If you want more ideas for renter friendly wall decor, check out our guide on transform your space with simple DIY wall art ideas. It covers similar projects that leave no marks.
Making Your Display Last Through the Year
String lights are durable, but photos can fade in direct sunlight. Place your display on a wall that does not get harsh afternoon sun. If you must put it near a window, use UV resistant glass when printing your photos.
LED string lights last for thousands of hours. They stay cool to the touch, so you do not have to worry about fire risk or heat damage to your prints. Turn them off during the day to save electricity and preserve the bulb life.
Swap out photos for different seasons. Use warm tones in fall and bright colors in spring. You can also add small decorations like mini ornaments during the holidays. The string lights become a year round frame for your changing memories.
Tools That Make This Project Even Easier
You do not need a toolbox for this project. But a few simple tools can save you time and frustration.
- A laser level projects a straight line onto the wall. It helps you place hooks evenly without measuring.
- A pair of needle nose pliers helps if your clothespins are stiff.
- A small step stool lets you reach high spots safely.
Most of these items are cheap and reusable. If you plan to do more DIY projects around your home, consider building a basic tool kit. Our article on top 10 essential tools for successful DIY home projects lists everything a beginner needs.
How to Remove the Display Without Leaving Marks
Moving out is stressful enough. You do not want to worry about damaged walls. Removing a string light display is simple if you follow these steps.
First, unplug the lights and remove the photos. Second, take the string lights off the hooks. Third, remove each adhesive hook slowly. Pull the tab straight down along the wall, not outward. If the adhesive resists, use a hair dryer on low heat for 15 seconds. The glue softens and the hook comes off clean.
Wipe the wall with a dry cloth to remove any dust. The wall should look exactly like it did before you started. This method works on painted drywall, wallpaper, and even textured walls.
For more renter friendly storage and display ideas, read our guide on easy DIY storage solutions for small spaces. It includes tips for making the most of your square footage.
Why This Project Works for Every Budget
String lights cost between ten and twenty dollars for a good quality set. Clothespins cost two dollars. Adhesive hooks cost five dollars for a pack. Printing photos at a drugstore costs about fifteen cents each. Your total cost is under thirty dollars.
Compare that to a custom picture frame or a commissioned art piece. This project gives you a personalized gallery for less than the price of a single framed print. It also allows you to change the photos whenever you want. You are not locked into one look.
If you want to spend even less, use photos you already have printed. Repurpose old holiday cards or magazine cutouts. The string lights make everything look intentional and artistic.
A Final Thought on Your DIY Photo Display Wall
Your home should reflect who you are. A blank wall does not do that. A DIY photo display wall using string lights turns that empty space into a story. It shows your friends where you have been and who you love. It costs little and asks for no permanent commitment.
Set aside one evening this week. Print your favorite photos. Grab a set of string lights. Build the wall that makes your space feel like yours. You will wonder why you did not do it sooner.