
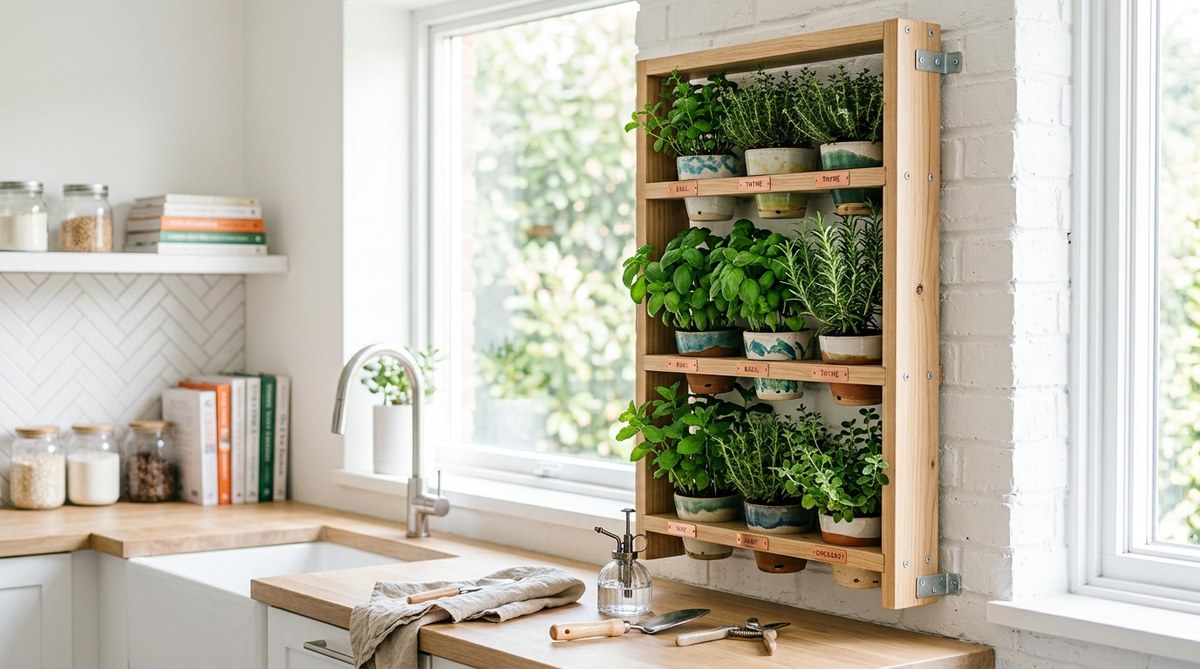
You love cooking with fresh herbs. But your kitchen counter is already packed. The windowsill only fits two small pots. And spending five dollars on a bundle of basil that wilts by Wednesday feels like a waste.
A DIY vertical herb garden solves all of that. It uses wall space you are not using. It keeps herbs within arm’s reach while you cook. And it costs a fraction of what you would pay for a store-bought system.
Let me show you exactly how to build one this weekend.
A DIY vertical herb garden turns unused wall space into a living pantry. You can build a sturdy wooden planter with basic tools for under $40. Pick herbs that thrive indoors like basil, mint, and chives. Mount it near a sunny window and water from the top. Within two weeks you will have fresh herbs for every meal.
Why a Vertical Garden Works Better Than Pots
Standard pots take up valuable counter real estate. They also dry out unevenly because the soil surface is small. A vertical setup uses gravity to your advantage. Water drains from the top planter down to the lower ones. Roots get consistent moisture without you having to check each pot every day.
Another benefit is airflow. Herbs sitting on a counter can get stuffy and develop mold. When they hang vertically, air circulates around each plant. That means healthier leaves and fewer pest problems.
And let me be honest about the aesthetic. A wall of green herbs looks beautiful. It makes your kitchen feel alive. Friends will ask where you bought it. You get to say you built it yourself.
What You Need to Build Your DIY Vertical Herb Garden
Gather these materials and tools before you start. Most items are available at any hardware store.
Materials:
- 1×4 pine boards (8 feet long, you will cut them down)
- 1×2 pine boards (for the back supports)
- Wood screws (1.5 inches and 2 inches)
- Wood glue
- Sandpaper (120 grit and 220 grit)
- Exterior-grade wood finish or paint
- Landscape fabric or coconut coir liners
- Potting mix designed for herbs
- Herb seedlings or seeds
Tools:
- Circular saw or hand saw
- Drill with screwdriver bits
- Measuring tape
- Level
- Stud finder
If you are new to woodworking, check out this guide on top 10 essential tools for successful DIY home projects. It covers everything a beginner needs.
Step-by-Step Building Instructions
Follow these numbered steps to build your vertical herb garden.
1. Cut the wood to size.
Measure and mark your 1×4 boards into three equal sections. Each section will become one planting box. A good length is 24 inches per box. That gives enough room for three to four herb plants per tier.
Cut the 1×2 boards into two pieces at 24 inches each. These will be the back rails that hold the boxes together.
2. Assemble the planting boxes.
Take one 24-inch 1×4 board for the bottom. Attach two more 1×4 boards for the front and back. Use wood glue and 1.5-inch screws. Pre-drill holes to prevent the wood from splitting.
The sides of each box are made from short offcuts. Cut four pieces at 5.5 inches each. Attach them to the ends of the box.
Repeat this for all three boxes.
3. Sand and finish.
Sand every surface with 120 grit paper. Then go over it again with 220 grit. This removes splinters and gives a smooth finish.
Apply two coats of exterior-grade finish or paint. Let each coat dry for 24 hours. A waterproof finish is important because the wood will get wet every time you water.
4. Attach the back rails.
Lay the three boxes on a flat surface. Position them so they are stacked vertically with a 6-inch gap between each box. Place the 1×2 back rails across the back of all three boxes. Screw through the rails into each box using 2-inch screws.
This creates one rigid unit that you can hang on the wall.
5. Line the boxes.
Cut landscape fabric to fit inside each box. Leave enough overlap to cover the sides. Staple the fabric in place. The fabric holds soil in while letting excess water drain out.
6. Mount the garden on your wall.
Find a stud in your wall using a stud finder. Mark the location. Drill pilot holes through the top back rail and into the stud. Use 3-inch screws for a secure hold.
Make sure the unit is level before you tighten the screws fully.
7. Add soil and plants.
Fill each box with potting mix. Leave one inch of space at the top. Plant your herbs according to the spacing instructions on the seed packet or nursery pot.
Water gently from the top box. The water will drain down through the soil and into the lower boxes.
Best Herbs for Your Vertical Garden
Not every herb grows well indoors. Some need more light or space than a vertical planter can provide. Stick to these proven varieties.
| Herb | Light Needed | Growth Habit | Best For |
|---|---|---|---|
| Basil | 6+ hours direct sun | Bushy, upright | Pesto, salads, pasta |
| Mint | 4-5 hours indirect | Spreading, vigorous | Tea, drinks, desserts |
| Chives | 4-6 hours sun | Grass-like clumps | Eggs, potatoes, soups |
| Thyme | 5+ hours direct | Low, trailing | Roasts, vegetables, marinades |
| Oregano | 5+ hours direct | Compact, woody | Pizza, sauces, grilled meat |
| Cilantro | 4-5 hours indirect | Tall, delicate | Salsas, tacos, curries |
| Parsley | 4-6 hours sun | Deep rooted | Garnish, tabbouleh, sauces |
Mint is aggressive. Plant it alone in the bottom box so it does not crowd out other herbs. Basil needs the most light, so put it in the top box where it gets maximum sun.
Common Mistakes and How to Avoid Them
I made most of these mistakes myself. Learn from them so your first garden thrives.
| Mistake | Why It Happens | The Fix |
|---|---|---|
| Overwatering | Soil stays wet because drainage is poor | Add more landscape fabric holes. Use a lighter potting mix with perlite. |
| Underwatering | Water runs straight through dry soil | Water slowly. Let the soil absorb before adding more. |
| Leggy plants | Not enough sunlight | Move the garden to a south-facing window. Add a grow light if needed. |
| Yellow leaves | Too much fertilizer or poor drainage | Feed herbs at half strength. Ensure water can escape the bottom box. |
| Pest problems | Stagnant air around leaves | Open a window nearby. Wipe leaves with a damp cloth weekly. |
“The biggest mistake people make is treating indoor herbs like outdoor plants. Indoor herbs need less water, less fertilizer, and more consistent light. Give them those three things and they will reward you with growth all winter.” — Emily Chen, urban gardening educator
Watering and Care Tips for Long-Term Success
Your vertical herb garden needs a simple care routine. Follow these guidelines.
- Water from the top box only. Let gravity carry water down to the lower boxes.
- Check the bottom box first. If it feels damp, skip watering for a day.
- Use room-temperature water. Cold water shocks the roots.
- Fertilize once a month with a diluted liquid fertilizer. Herbs do not need heavy feeding.
- Prune regularly. Pinch off the top leaves to encourage bushier growth.
- Rotate the garden every two weeks. This ensures all sides get equal light.
If you travel often, consider adding a drip irrigation system. You can learn more in this guide about can you build your own smart garden system. It explains how to automate watering with a simple timer and tubing setup.
How to Style Your Vertical Garden in a Small Kitchen
A vertical herb garden does not have to look utilitarian. With a few styling choices, it becomes a design feature.
Paint the wood to match your cabinets. White or light gray blends into the background. Dark green or navy makes the herbs pop.
Add small hooks underneath the bottom box. Hang measuring spoons or a pair of kitchen shears there. It keeps tools handy and frees up drawer space.
Place the garden near your prep area. If you chop vegetables on the counter, mount the garden directly above it. You can snip herbs without moving from your cutting board.
For more ideas on using vertical space, read about easy DIY storage solutions for small spaces. The same principles apply to organizing your kitchen.
Your Fresh Herb Supply Starts This Weekend
Building a DIY vertical herb garden takes about three hours of active work. Add two days for the finish to dry, and you are ready to plant. Within a month you will have a steady supply of basil, mint, chives, and thyme.
No more buying plastic clamshells of herbs that go bad in the fridge. No more forgetting to water a sad pot on the windowsill. Just fresh flavor hanging on your wall, ready whenever you cook.
Start with the materials list above. Cut your boards this Saturday morning. By Sunday afternoon you will be planting your first seedlings. Your future self will thank you every time you reach up and snip fresh basil for your pasta.