Easy polymer clay jewelry project…
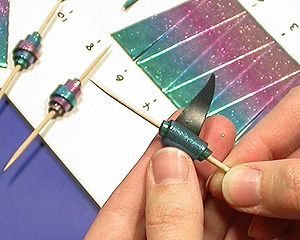
These sheets can be used in a variety of polymer clay projects, such as the simple but effective Roll-up beads shown below.
The EJR Beads Ultrafine Glitters have fantastic sparkle and a very fine particle size. This makes them perfect for creating gradated metallic blends using the technique shown below. The wonderful thing about creating your own metallic glitter blends is that, unlike rainbow-effect transfer foils, you are in control. You can chose how many colours to blend together and the width and orientation of each band of colour.
You can adapt the project to use other types of glitters, mica powders and so on, although obviously the end result will vary depending on the product used.
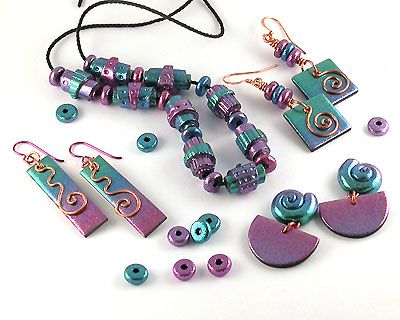
You will need:
- EJR Beads¬†Ultrafine Glitter Collection – “Anodized”
- Black Fimo Classic or Fimo Soft polymer clay Р? a small block should be enough
- Fimo Waterbased Varnish
- Pasta machine or hand roller and 1.5 mm rolling guides
- Ceramic tile or suitable work surface
- Tissue Blade or craft knife
- Small steel ruler
- Paintbrushes
- Piece of baking paper  / baking parchment
- Permanent marker pen
- Several wooden toothpicks
- Baking tray & sheet of cardstock or bead baking rack

Step 1
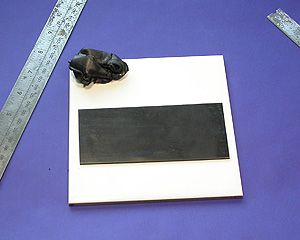
Condition the polymer clay, kneading it until soft and pliable.
Roll out a sheet approximately 1- 1.5 mm thick. On my pasta machine, this is the third thickest setting but machines do vary.
Cut a neat rectangle 6 cm wide and as long as you care to make it. Lay it on a ceramic tile.
Step 2
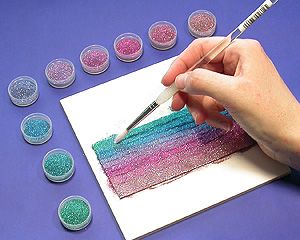
Set the 9 different colours from the “Anodized” Ultrafine Glitter kit¬† into a paint palette or separate containers. Make sure to keep them in number order!
Brush a generous line of each colour along the length of the sheet, working in number order.
Step 3
Blend the colours together a little using tip of the brush. Work along the lines not up and down. This will help the colours stay relatively separate and only blend with their nearest neighbours.
When done, brush off any excess glitter. You can collect this and save it for other projects – it will blend into a pretty periwinkle colour.
Step 4
You can now chose which effect to use. If you leave the sheet as it is, the colours are blended together but remain quite sparkly.
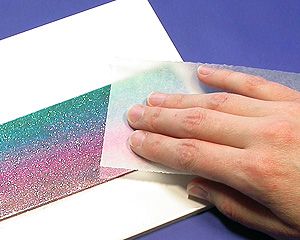
For a more metallic look, gentle rub a piece of baking paper all over the sheet. This will burnish the glitter particles, flattening them down so they reflect the light more evenly. The camera doesn’t pick up this effect too well, but you will see when you do it. Cool huh?!
Step 5
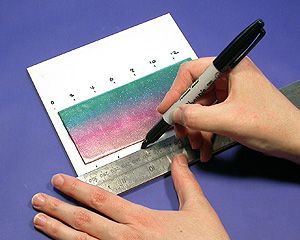
Using a permanent marker pen and ruler, measure and mark the tile every other centimetre along both edges of the clay.
Mark only the even numbers along one side and then the odd numbers  along the other edge. (So the top edge has a mark at 0, 2, 4 cm etc. The bottom edge is marked at 1, 3, 5 cm etc.)
These guide marks will come off easily afterwards with a quick wipe of methylated spirits / rubbing alcohol.
Step 6
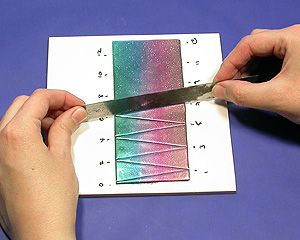
Using the guide marks, cut diagonally from point to point to cut the sheet into neat triangles.
You can make the cuts with a tissue blade or carefully use a craft knife against a metal ruler.
If you are using a tissue blade, you may find it easier to turn the tile so the cutting position is a little more natural.
Step 7
Loosen the triangles from the tile, taking care not to stretch or push them out of shape.
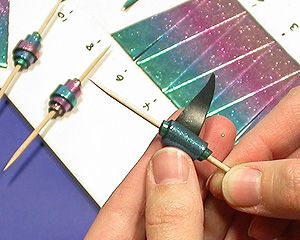
Starting from the wide end roll each triangle up around a wooden toothpick.
Step 8
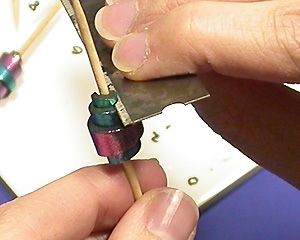
Carefully trim the ends of each bead to a flush finish using a craft knife or tissue blade.
Brush a little glitter over all the cut clay edges if you wish. You can use the leftover glitter saved from earlier steps. Waste not, want not!
Step 9
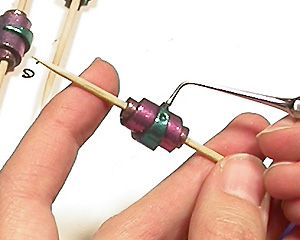
Indent random textures into the beads if you wish, using a ball stylus tool, wax carver tools or anything else that springs to mind.
Gently loosen each bead so it turns freely on the wooden toothpick.
Transfer the beads to a bead baking rack and bake as per the clay manufacturer’s instructions. (You can bake the beads on the wooden toothpicks using the method shown in the¬†Microfine glitter project¬†if you prefer.
Once cool, the beads can be varnished with a waterbased varnish.